Emulated Features and Sensors
To simulate various behaviors of your application according to specific use cases, Genymotion provides easy-to-use widgets which emulate the following sensors and features:
Sound volume
You can control the volume of the sound emitted by your virtual device by clicking or
Rotate screen
This feature is not available with Android Automotive
You can rotate the screen of your virtual device by clicking
Full-screen
You can turn the full-screen mode on or off by clicking
Clipboard
This feature is not available with Android Automotive
Copy/Paste to the virtual device
- Click
- Paste your text into the clipboard text field.
- From within the virtual device, hold the left mouse button in the field you wish to paste to.
- Click Paste as on a real Android device.
Copy/Paste from the virtual device
- From within the virtual device, select the text you wish to copy and hold the left mouse button.
- Click Copy or Cut as on a real Android device.
- Click - the copied text is displayed in the clipboard text window.
- The text is automatically copied to your OS clipboard.
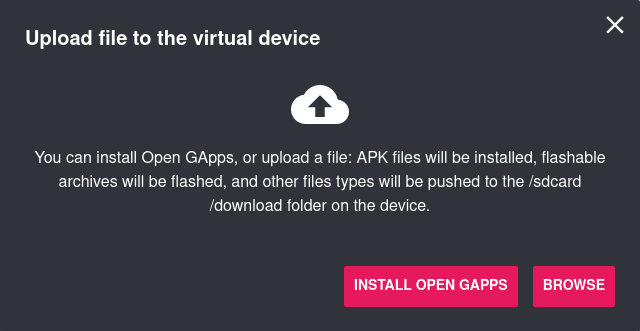
File upload
You can upload files from your computer to the virtual device.
-
Click to open the widget window:
-
Click BROWSE to browse for the file you wish to upload.
Uploaded files are stored in /sdcard/Download on the virtual device.
You can also install the Open GApps package by clicking INSTALL OPEN GAPPS.
Camera and Microphone
This feature is not available with Android Automotive
The Camera and Microphone injection widget allows you to send a video and audio stream from a virtual device to the Android system. With this widget, you can test an Android application that uses an Android built-in camera and microphone. The video stream comes from a real physical webcam and microphone connected or integrated into your computer.
To use the Camera and Microphone injection widget:
- Click
- Allow your web browser to access your host webcam and microphone when prompted:
Battery
This feature is not available with Android Automotive
The Battery widget allows you to test how your application reacts with different battery charge levels and states of charge.
To use the Battery widget, click
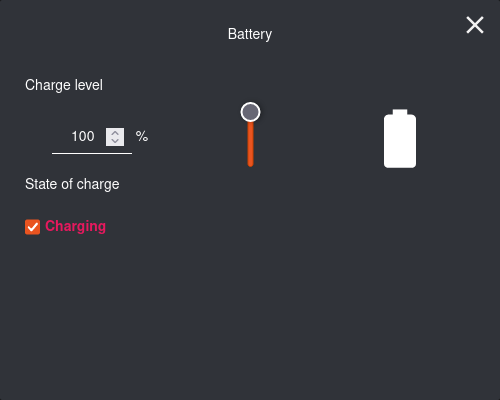
You can:
- Modify the charge level using the slider or enter a value in the Charge level field.
- Toggle the State of charge: check to simulate Charging state, or uncheck to simulate Discharging state.
GPS
Many applications do not rely on the GPS orientation, but use the device accelerometer or gyroscope to determine the bearing of the device, which are not yet supported.
The GPS widget allows real-time activation and modifications of a position, accuracy and bearing.
To use the GPS widget, click
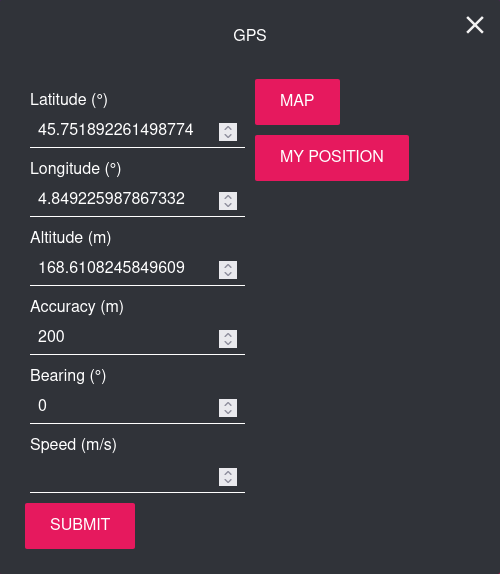
Then, set the following values:
| Value range | Note | |
|---|---|---|
| Latitude | -90° to 90° | |
| Longitude | -180° to 180° | |
| Altitude | -10000 m to 10000 m | |
| Accuracy | 0 m to 200 m | Use the slider or enter a value. |
| Bearing | 0° to 359.99° | Use the compass or enter a value. |
| Speed | 0 m/s to 399.99 m/s |
You can also:
- Click My Position to get your current position.
- Click Map to open the built-in map and set your location. Once done, click Capture to retrieve the coordinates.
Click Submit to apply the change.
Capture
The Capture widget allows you to take a screenshot or screencast of virtual devices. This way, you can broadcast images or videos of your applications.
To open the capture window, click
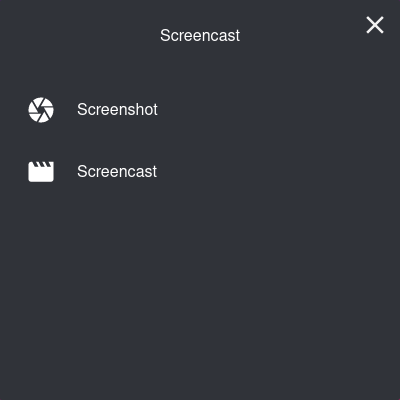
Then, select an action:
- Screenshot: take a screenshot of your virtual device display.
- Screencast : record your device display. Click to stop recording.
Identifiers
This feature is not available with Android Automotive
The Identifiers widget shows Android ID and Device ID numbers. You can view and edit these values at any time, without having to reboot your virtual device.
To use the Identifiers widget, click
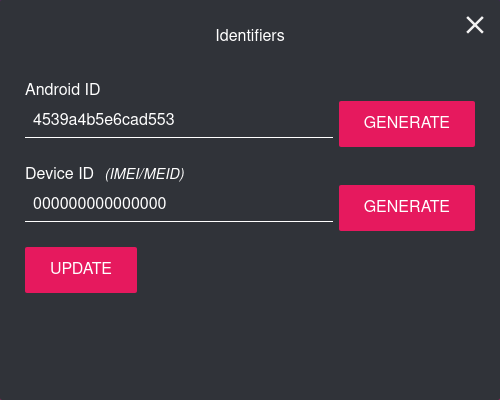
Set values or click GENERATE to generate random values. Click UPDATE to apply.
You cannot set an empty Android ID.
Network
The Network widget allows you to test how your application reacts with different network quality and performance types.
Click to open the widget window:
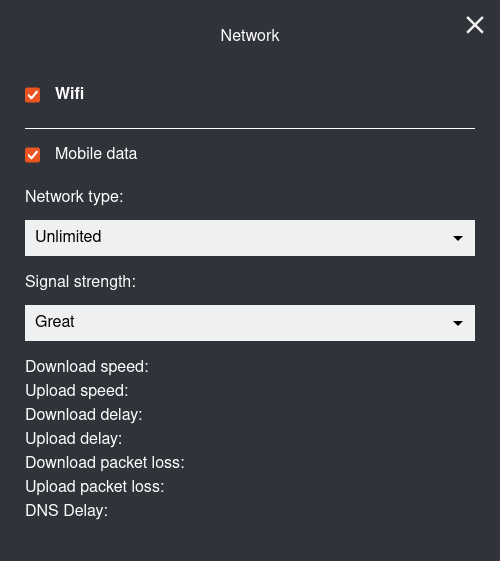
By default, Wifi is enabled. To disable Wifi and simulate Mobile Data transfer speed, uncheck Wifi, select a Network Type and a Signal Strength from the drop-down lists.
Network profiles and their corresponding values with max Signal strength (Great) are listed in the table below:
| Download speed | Upload speed | Upload/Download delay (in ms) | Upload/Download packet loss | |
|---|---|---|---|---|
| Unlimited | No Limit | No Limit | No Limit | No Limit |
| 2G GSM | 14Kb/s | 14 Kb/s | 500 | 0 |
| 2G GPRS | 57Kb/s | 28Kb/s | 300 | 0 |
| 2G EDGE | 236Kb/s | 236Kb/s | 75 | 0 |
| 3G UMTS | 384Kb/s | 384Kb/s | 75 | 0 |
| 3G HSDPA | 13.98Mb/s | 5.76Mb/s | 10 | 0 |
| 4G LTE | 173Mb/s | 58Mb/s | 5 | 0 |
| 5G | 1174Mb/s | 211Mb/s | 5 | 0 |
Baseband
SIM data (Baseband) is only simulated: it is not possible to send or receive calls or messages to/from physical phones or tablets.
Baseband emulation allows you to test different mobile network operators with different SIM operators.
Click to open the widget window:
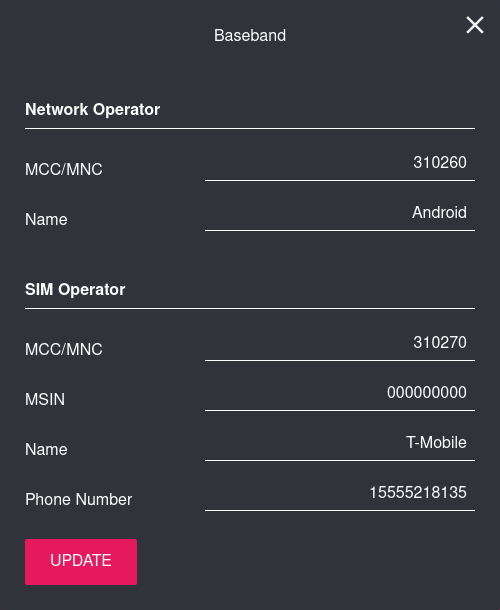
Fill the fields with the desired values:
| Network Operator | |
|---|---|
| MCC/MNC | Enter a Mobile Country Code for the Network operator. |
| Name | Enter a name for the Network Operator. |
| SIM Operator | |
|---|---|
| MCC/MNC | Enter a Mobile Country Code for the SIM operator. |
| MSIN | Enter a mobile subscription identification number used by the SIM operator. |
| Name | Enter a name for the SIM operator. |
| Phone Number | Enter the phone number corresponding to the SIM. |
Click UPDATE to apply the changes.
Phone
Phone is only simulated: it is not possible to send or receive calls or messages to/from physical phones or tablets.
The Phone widget allows you to test applications relying on telephony features and observe their behavior when receiving a call or a text message.
To open the Phone widget, click . Then, enter a fictious incoming phone number and:
- Click Call to simulate an incoming call.
- Enter a text message and click Send message to simulate an incoming text message.
Text messages are displayed in the virtual device via a notification, but they can also be read in the Messaging application.
Disk I/O
The Disk I/O widget allows you to emulate devices with slow internal storage. It can be very handy if your app requires reading large amount of data from the disk such as gallery apps that load locally stored images or game apps that load large files.
As the speed limit provided by this feature comes on top of the one already defined in your Cloud provider instance, make sure the profile you wish to apply does not exceed the disk performance already provided in the instance. If so, the widget will not be able to emulate the expected disk performance. For more information, refer to your Cloud provider documentation.
Click to open the widget:
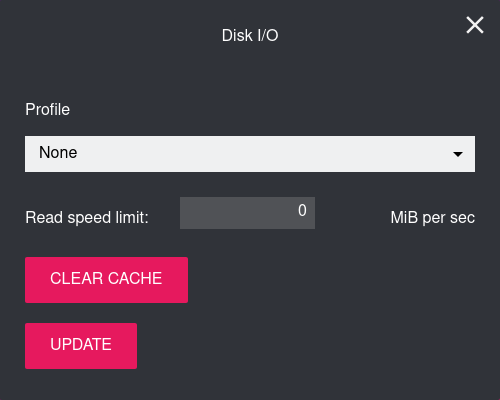
In Profile, select a type of device:
- High-end device: Read speed limit 200MiB per second.
- Mid-range device: Read speed limit 100MiB per second.
- Low-end device: Read speed limit 50MiB per second.
- Custom device: Enter the read speed limit you wish to emulate in MiB.
Click UPDATE to apply the change.
When switching from a device profile to another, the disk cache is automatically cleared. You can force clearing the cache by clicking CLEAR CACHE.
Biometrics
This feature is not available with Android Automotive.
This feature is only available for Android 13 and above.
The Biometrics widget allows you to simulate fingerprint recognition.
Click to open the widget window:
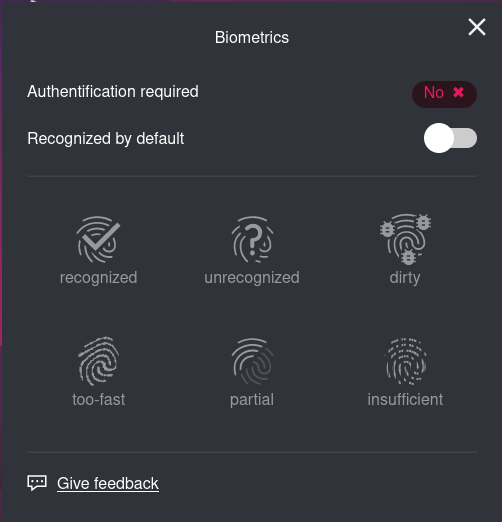
The icons will only become available when fingerprint enrollment starts in Android. At this moment, Authentication required will turn to Yes:

Then, you will be able to click on one of the icons to simulate the following scenarios:
- recognized: the fingerprint is matched and recognized.
- unrecognized: the fingerprint is not matched nor recognized.
- dirty: the fingerprint is dirty.
- partial: only part of the fingerprint is matched.
- insufficient: the fingerprint quality is not good enough to be recognized.
- too fast: the fingerprint capture has been made too fast to be recognized.
You can also toggle Recognized by default to automatically respond to a fingerprint enrollment with the recognized scenario.
Important Note
In order to use this widget in any application asking for Fingerprint authentication, you need to configure one fingerprint in Android.
Follow these step, in Android:
- Go to "Settings".
- Then "Security & privacy".
- Then "Device unlock" and "Fingerprint"
- Select a screen lock method
- Enter your Pattern, PIN or Password and click NEXT
- Confirm and proceed to the setup
- Use the Biometric widget to configure one finger
Navigation Widgets
The navigation widgets emulate the Android navigation buttons:
- : bring the Android Recents Screen which lists recently accessed activities and tasks.
- : navigate to Android Home page.
- : kill the current activity and resumes the previous one.
Power
The power widget does not shut down the instance, and you will still be charged by the Cloud provider. To shutdown an instance safely, use the Power Off and Reboot feature, or do it from your Cloud provider EC2 dashboard.
The Power Widget emulates a real device power button:
- Sleep mode: click .
- Power off/Reset: click and hold .