Create Pre-configured Images
For faster deployment, you may want to start already pre-configured instances.
- Create a Genymotion instance and set it up with all the settings, tools and applications you need.
-
From the EC2 Management console, select this instance and click on Actions > Image and templates > Create Image. This will create an AMI in the geographic zone where the instance was launched. You can find it in the Image > AMIs page.
Use a custom image in another geographic zone
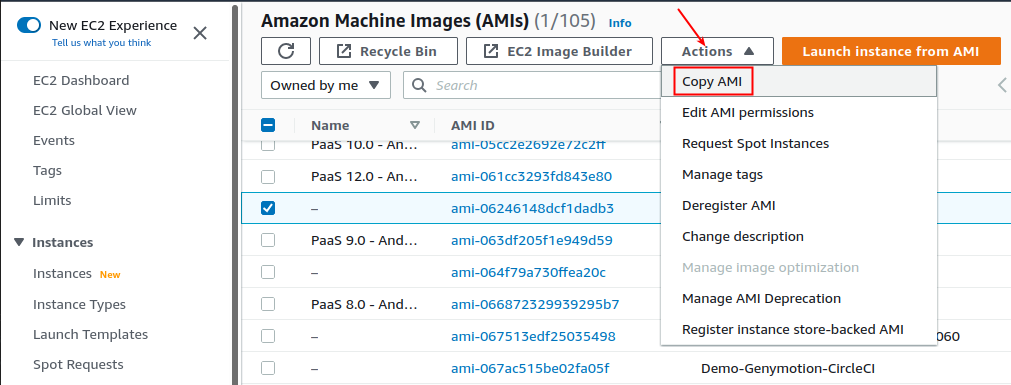
To use your custom images on another geographic zone, select them in Image > AMIs and click on Actions > Copy AMI > Select the zone:
-
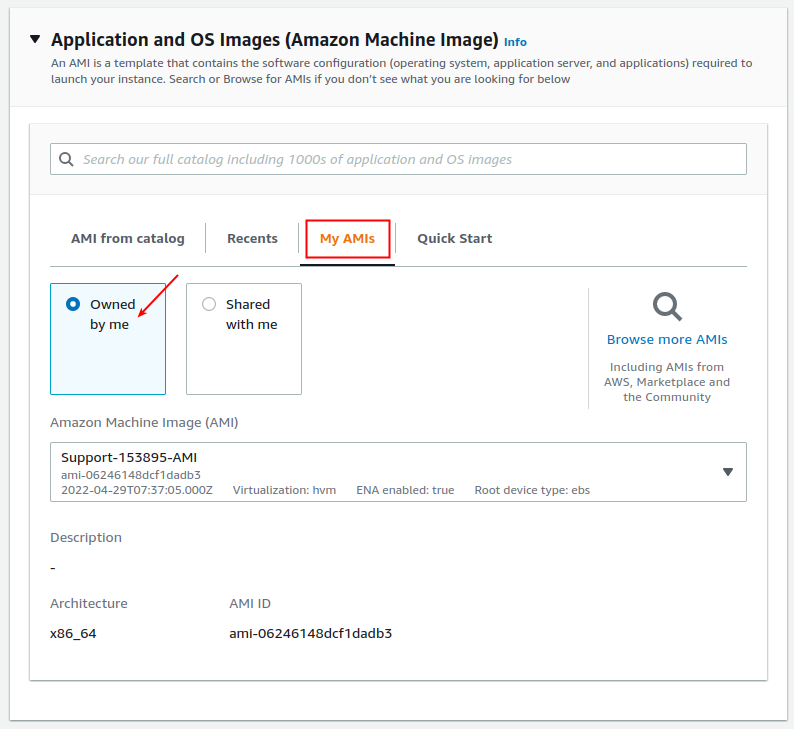
When creating new instances, simply select the AMI you created from My AMIs:
-
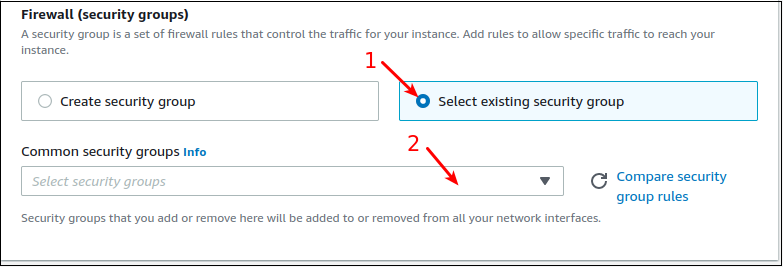
Make sure to use similar settings, especially the same security group(s) or firewall rules, as the original instance:

- Create a Genymotion instance and set it up with all the settings, tools and applications you need.
- In Compute Engine, go to Snapshots and create a snapshot from this instance - it can be used as a base custom image.
- To create a new instance with this custom image, go to Create instance in Compute Engine and select the snapshot you created as the boot disk image.
- Create a Genymotion instance and set it up with all the settings, tools and applications you need.
- From ECS/Instances, select this instance and click on More > Disk and Image > Create Custom Image. This will create a custom image in the geographic zone where the former instance was launched.
- To create a new instance with this custom image, click Create an instance from the ECS Console in Overview.
- In the Image section, select Custom image and select the image you created from the drop down menu. This will create a launch an instance with the same settings and contents as the original instance:

-
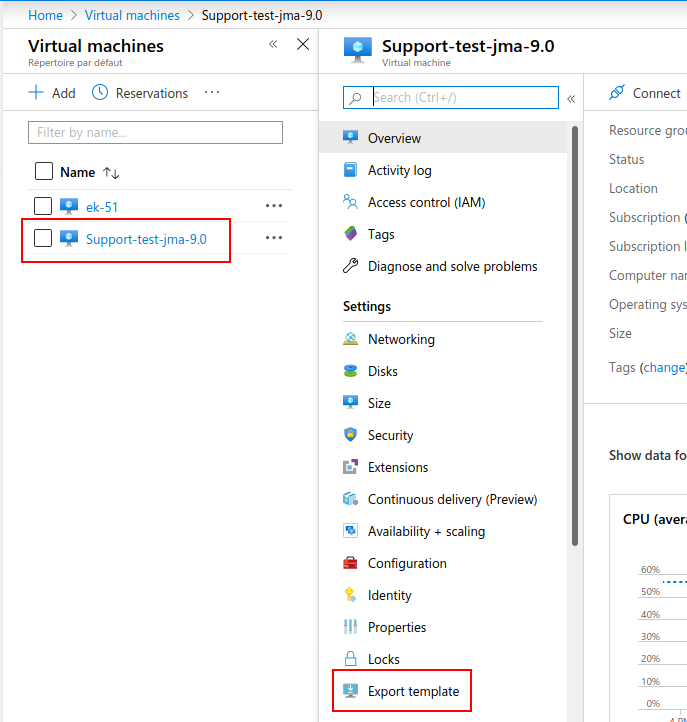
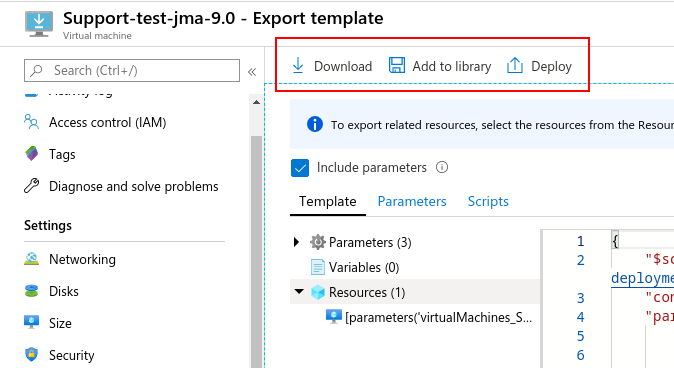
Go to the Virtual Machine section, select the instance you wish to use as a template and click on Export Template:
-
You can download the template as a .zip file, add it to your library or deploy it directly:
-
To use your new template, please refer to Use exported templates for details and instructions.