Emulated Sensors and Features
The widgets visibility in the right tool bar will vary depending on the virtual device display window size and your screen resolution. To display all the available widgets, click on top of the tool bar.
To simulate various behaviors of your application according to specific use cases, Genymotion Desktop provides easy-to-use widgets which emulate the following sensors and features:
Capture
The Capture widget allows you to take a screenshot or screencast of virtual devices. This way, you can share images or videos of your applications.
To open the capture window, click
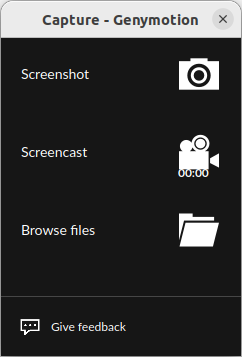
Then, select an action:
- Screenshot : take a screenshot.
- Screencast : record a screencast. Click again to stop.
- Browse file : browse the recorded screenshots and/or screencasts folder.
The default folder can be changed in Genymotion > Settings > Device.
Battery
The Battery widget allows you to test how your application reacts with different battery charge levels and states of charge.
Click to open the widget:
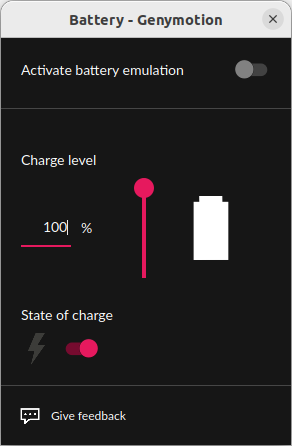
Then, you can:
- edit the charge level using the slider, or enter a value in the Charge level input field
- toggle the state of charge with the State of charge switch
GPS
Click to open the GPS widget window:
Single position
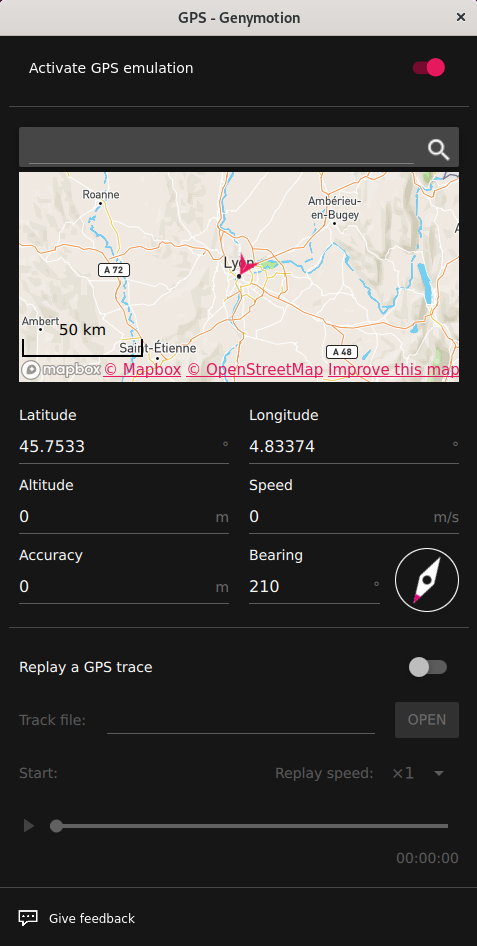
To use the GPS widget and set a single position:
- Toggle the Activate GPS emulation switch.
- Set the following values:
| Description | Value range | |
|---|---|---|
| Latitude | The latitude value you wish to simulate. | -90° to 90° |
| Longitude | The longitude value you wish to simulate. | -180° to 180° |
| Altitude | The altitude value you wish to simulate. | -10000m to 10000m |
| Speed | Set a speed in meters per second. | 0m/s to 99999.99m/s |
| Accuracy | Use the slider or enter a value to set the accuracy. | 0m to 200m |
| Bearing | Use the compass or enter a value to set the bearing. | 0° to 359.99° |
You can also define a location using the built-in map.
Many applications do not rely on the GPS orientation, but use the device accelerometer or gyroscope to determine the bearing of the device. This is not emulated yet, but you can use the device link feature to use a real device with accelerometer and/or gyroscope.
Simulate routes
3.3.0 - Paying
It is also possible to simulate routes by uploading a track file.
Requirements & Limitations
- This feature only supports GPX and KML trace formats for now. More formats may be added in the future.
- GPX files must at least have one point with latitude and logitude data.
- If elevation is missing, it will default to 0.
- If timestamp is missing from a data point, it will default to the previous data point timestamp plus 1 second.
- If the data points are not in chronological order, they will be sorted before being played.
- If your trace file contains more than one track, only the first track will be played.
Here are examples of valid GPX and KML track files:
Example
<?xml version="1.0" encoding="utf-8"?><gpx xmlns="http://www.topografix.com/GPX/1/1" creator="Genymobile team" version="1.1">
    <trk>
        <trkseg>
          <trkpt lat="46.0536" lon="6.6700"><ele>1417.2867431640625</ele><time>2020-02-21T13:51:10Z</time></trkpt>
          <trkpt lat="46.0537" lon="6.6697"><ele>1417.2867431640625</ele><time>2020-02-21T13:51:12Z</time></trkpt>
          <trkpt lat="46.0537" lon="6.6695"><ele>1413.73291015625</ele><time>2020-02-21T13:51:14Z</time></trkpt>
          <trkpt lat="46.0537" lon="6.6694"><ele>1412.38671875</ele><time>2020-02-21T13:51:16Z</time></trkpt>
          <trkpt lat="46.0538" lon="6.6692"><ele>1410.734375</ele><time>2020-02-21T13:51:18Z</time></trkpt>
        </trkseg>
    </trk>
</gpx>
<?xml version="1.0" encoding="UTF-8"?>
<kml xmlns="http://www.opengis.net/kml/2.2"
xmlns:gx="http://www.google.com/kml/ext/2.2">
<Folder>
  <Placemark>
    <gx:Track>
      <when>2010-05-28T02:02:09Z</when>
      <when>2010-05-28T02:02:35Z</when>
      <gx:coord>-122.207881 37.371915 156.000000</gx:coord>
      <gx:coord>-122.205712 37.373288 152.000000</gx:coord>
    </gx:Track>
  </Placemark>
</Folder>
</kml>
Usage
- Generate a GPX or KML track file with your favourite application, such as GoogleEarth.
- If it is not already enabled, toggle Activate GPS emulation on.
-
Toggle the Replay a GPS trace feature on:

-
Click Open to upload your trace file.
-
Click to start or pause the route simulation:
-
Change play speed by selecting a replay speed in the drop-down menu.
Camera and Media Injection
3.3.0 - Paying
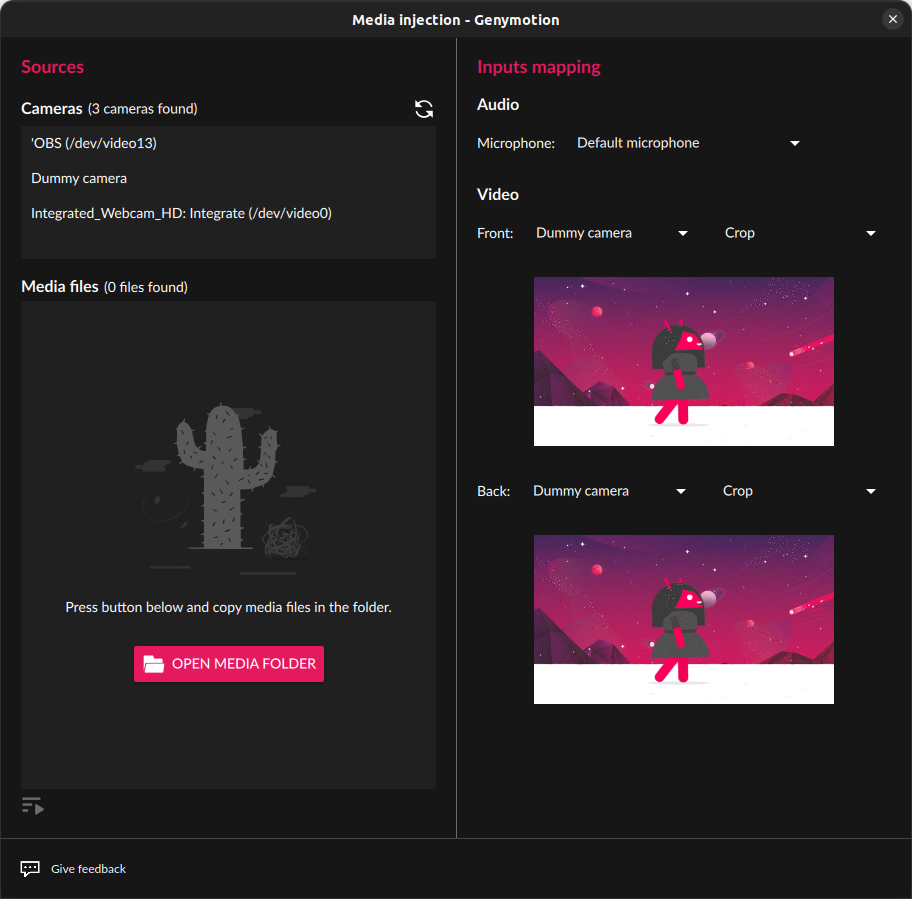
With this widget, you can select your host webcams, microphones, videos, images or audio files as the device camera and audio input source.
To open the widget window, click
Host physical camera
Your host physical camera devices are listed in the Cameras box:
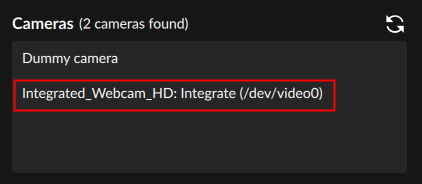
You can assign them to the virtual device front and/or back cameras in the Video section.
Media inputs
You can use image, video and audio files as audio and/or video inputs for the device.
Genymotion Desktop does not include any codecs: Most media files should work "out of the box" on Linux and macOS but you may need to install Codec packs on Windows, such as K-Lite Codec Pack Full .
-
In the Media files box, click OPEN MEDIA FOLDER:
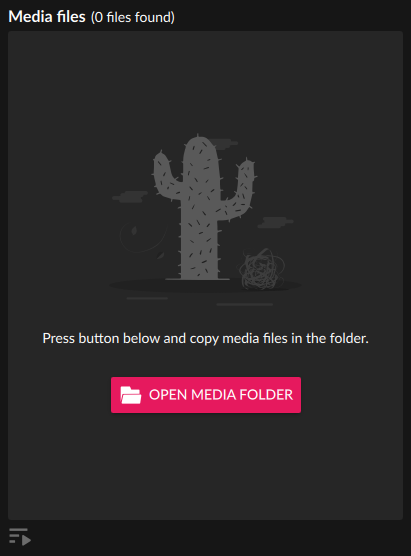
-
Copy your media files to the opened folder. The files you added should appear in the Media files box.
Media folder
Genymotion Desktop media folder is located at the following path:
%LOCALAPPDATA%\Genymobile\Genymotion\media
$HOME/.Genymobile/Genymotion/media
$HOME/Applications/Genymotion.app/Contents/MacOS/media
When done, you can:
- click to play your media files.
- select an audio file as Microphone input.
- select a video or image file as front and/or back Camera input.
- resize the video or image. Available resize profiles are
Crop,Keep aspectandResize:
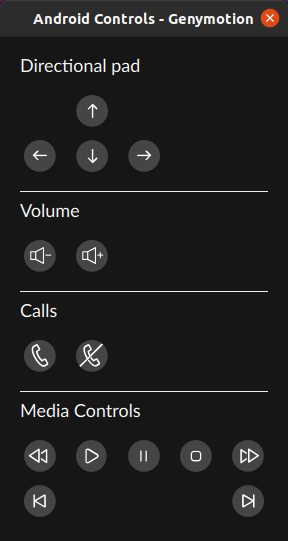
Android Controls
3.3.0 - Paying
With this widget, you can emulate the following Android controls:
- Directional pad
- Volume
- Calls
- Media controls
To open the widget, click
Identifiers
The Identifiers widget shows Android ID and Device ID/IMEI/MEID values. You can view and edit these values at any time, without having to reboot your virtual device.
To open the identifiers window, click and enter a value for each identifier or click to generate random values:
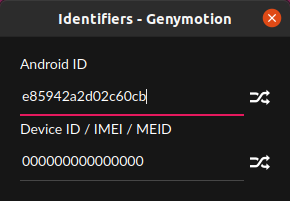
You cannot set an empty Android ID.
Device ID/IMEI/MEID value must be compliant with the GSM 02.16 standard and the 3GPP2 specification (14 digits or hexadecimal digits + a checksum digit). Valid characters for setting device ID/IMEI/MEID are lower-case and upper-case letters [a-z, A-Z], digits [0-9], dots [ . ], dashes [ - ] and underscores [ _ ].
Note
- On Android 8.0 and above, the Android ID has a different value for each application on the device. This is not the case in Genymotion: the Android ID remains the same for all applications.
- By default, a new virtual device is deployed with the default Device ID number 000000000000000.
Disk I/O
The Disk I/O widget allows you to emulate devices with slow internal storage. It can be very handy if your app requires reading large amount of data from the disk such as gallery apps that load locally stored images or games that load large assets.
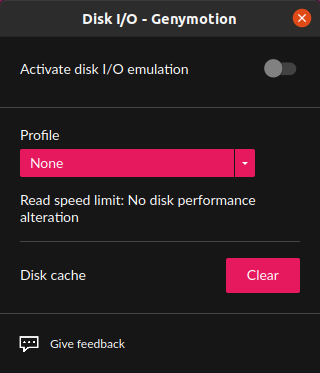
To simulate high or low disk performance:
- Click
- Enable disk I/O emulation.
- From the Profile drop-down box, select a type of device:
| Read speed limit | |
|---|---|
| High-end device | 200 MiB per second. |
| Mid-range device | 100 MiB per second. |
| Low-end device | 50 MiB per second. |
| Custom device | Enter the read speed limit you wish to emulate in MiB. |
When switching from a device profile to another, the disk cache is automatically cleared. You can force clearing the cache by clicking Clear.
Network
3.3.0 - Paying
The Network widget allows you to test your application with different network interfaces, network types and signal strength.
Click to open the network widget:
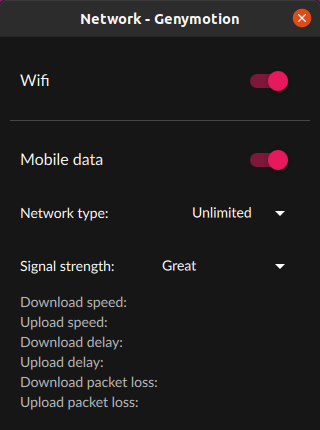
Wifi
When Wifi is enabled, your applications will behave as if you're connected on a Wifi network. Wifi is the interface enabled by default.
Mobile data
Mobile data is only simulated: Baseband (SIM data connection) is not emulated and it is not possible to send nor receive calls and text messages to other mobile devices from Genymotion.
To use this feature:
- Disable Wifi
- Enable Mobile data
-
Select a Network type from drop-down list:
Download speed Upload speed Upload/Download delay (in ms) Upload/Download packet loss Unlimited N/A N/A N/A N/A 2G GSM 14Kb/s 14 Kb/s 500 0 2G GPRS 57Kb/s 28Kb/s 300 0 2G Edge 236Kb/s 236Kb/s 75 0 3G UMTS 384Kb/s 384Kb/s 75 0 3G HSDPA 13.98Mb/s 5.76Mb/s 10% 0 4G LTE 173Mb/s 58Mb/s 5 0 5G 1174Mb/s 211Mb/s 5 0 -
Select a Signal strength from the drop-down list. Available values are:
Great,Good,Moderate,PoorandNone.
Disable all network
Simply disable Wifi and Mobile data to disable network altogether on the device.
Mobile data is only simulated: Baseband (SIM data connection) is not emulated and it is not possible to send nor receive calls and text messages to other mobile devices from Genymotion.
The Network widget allows you to test how your application reacts with different network quality and performance types:
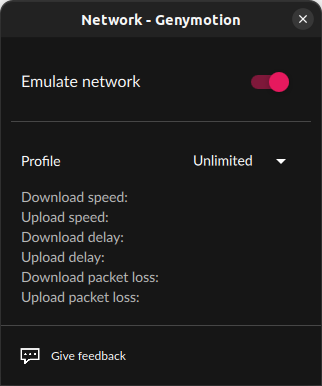
- Click
- Activate the network simulation with the switch
- Select a network profile from the drop-down list:
| Download speed | Upload speed | Upload/Download delay (in ms) | Upload/Download packet loss | DNS delay (in ms) | |
|---|---|---|---|---|---|
| Unlimited | N/A | N/A | N/A | N/A | N/A |
| No data | 0 | 0 | 100% | ||
| 2G GPRS | 57Kb/s | 28Kb/s | 300 | 0 | 1000 |
| 2G Edge | 236Kb/s | 236Kb/s | 75 | 0 | 800 |
| 3G UMTS | 384Kb/s | 384Kb/s | 75 | 0 | 200 |
| 4G LTE | 173Mb/s | 58Mb/s | 5 | 0 | 100 |
| 4G (High DNS delay) | 5.5Mb/s | 17.9Mb/s | 50 | 0.01% | 3000 |
| 4G (High packet losses) | 5.5Mb/s | 17.9Mb/s | 50 | 10% | 100 |
Baseband
3.5.0 - Paying
Network operator and SIM operator (Baseband) are only emulated: it is not possible is not possible to send nor receive calls to other mobiles devices from Genymotion.
Virtual devices do not have a phone number.
The Baseband widget allows you to test applications by providing information and control related to the network and SIM operators.
To use the Baseband widget, click on
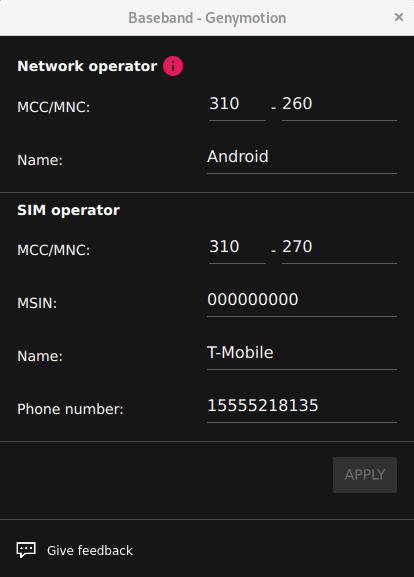
Then, for the Network operator section, enter the following information:
- MCC/MNC: The MCC/MNC to uniquely identify the mobile network operator
- Name: The operator name.
For SIM operator:
- MCC/MNC: The MCC/MNC to uniquely identify the mobile network operator
- MSIN: The MSIN to uniquely identify the mobile phone
- Name: The name of the operator
- Phone number: The simulated phone number.
Names of network and SIM operator are displayed in the Internet settings of the virtual device.
Phone
SIM data connection (Baseband) is not emulated: it is not possible to send or receive calls and text messages to other devices.
Virtual devices do not have a phone number.
The Phone widget allows you to test applications relying on telephony features and observe their behavior when receiving a call or a text message.
To use the Phone widget, click
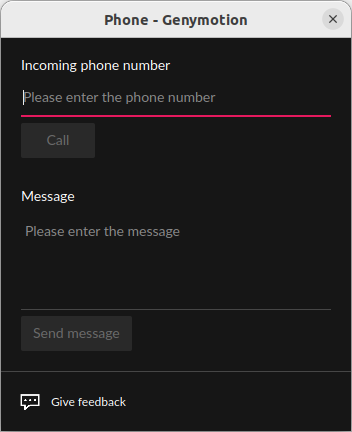
Then, enter a fictitious incoming phone number and:
- Click Call to simulate an incoming phone call
- Enter a text message and click Send message to simulate an incoming text message
Text messages are displayed in the virtual device via a notification, but they can also be read in the Messaging application.
Open GApps
For legal reasons, Google Play Store and Services are not pre-installed: you need to use this widget to install them.
The application you are developing or testing may require an interaction with Google Play Services (e.g.: in-app purchasing, advertising, etc.). The Open GApps widget allows you to install a minimum package of those services, also containing an application store.
We assume no liability whatsoever resulting from the download, install and use of Google Play Services within your virtual devices. DO IT AT YOUR OWN RISK!
To install the package:
- Click , or and Install Open GApps.
- Read the Disclaimer carefully and click Accept if you agree with the terms. The Open GAPPs package will be automatically downloaded and flashed.
- Reboot the virtual device when prompted. The device will reboot and, meanwhile, you will be redirected to Open GAPPS website.
To launch Google Play Store, hold the left mouse button and slide up from the bottom of the device display. Then, click Google Play:
Your device isn't compatible with this version
If the application cannot be found, or if Play Store displays the "Your device isn't compatible with this version" error message, please refer to Installation failure for more details and possible solutions.
Advanced developer tools
3.4.0 - Paying
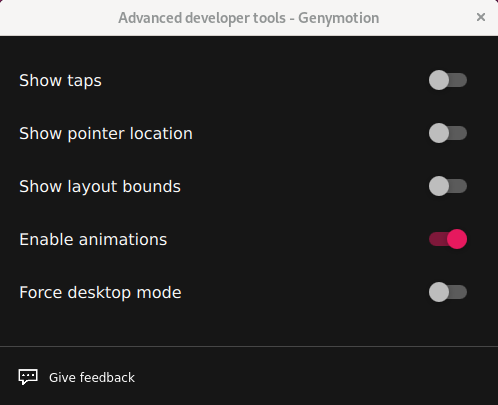
The Advanced developer tools widget provides quick access to the most common Android developer tools:
-
Root Access
For detailed instructions, please refer to Root Access. Only available with non-rooted Android images.
-
Show taps
- Show pointer location
- Show layout bounds
- Enable animation
-
Force desktop mode
Notes
- The 'Force desktop mode' tool only applies with multiple display.
- A reboot of the device is necessary to activate this tool.
Click to open the widget window and use the switches to toggle the tools you need to use:
Biometrics
3.6.0 - Paying
This feature is only available for Android 13 and 14 for the moment.
The Biometrics widget allows you to simulate fingerprint recognition.
Click to open the widget window:
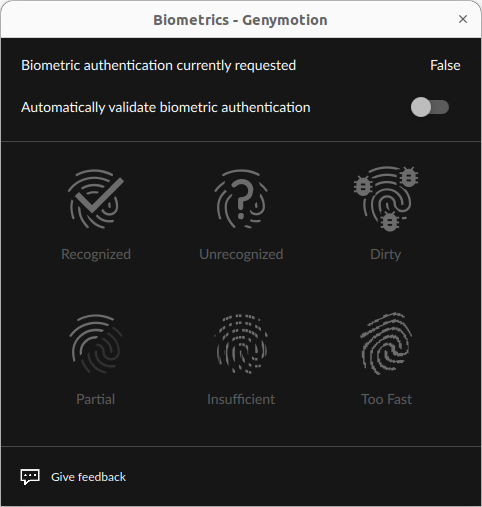
The icons will only become available when fingerprint enrollment starts in Android. At this moment, Biometric authentication currently requested will turn to True:

Then, you will be able to click on one of the icons to simulate the following scenarios:
- Recognized: the fingerprint is matched and recognized.
- Unrecognized: the fingerprint is not matched nor recognized.
- Dirty: the fingerprint is dirty.
- Partial: only part of the fingerprint is matched.
- Insufficient: the fingerprint quality is not good enough to be recognized.
- Too fast: the fingerprint capture has been made too fast to be recognized.
You can also toggle Automatically validate biometric authentication to automatically respond to a fingerprint enrollment with the Recognized scenario.
Important Note
In order to use this widget in any application asking for Fingerprint authentication, you need to configure one fingerprint in Android.
Follow these step, in Android:
- Go to "Settings".
- Then "Security".
- Then "Fingerprint".
- Then click on "Add fingerprint" and use the Biometric widget to configure one finger.
Here is a quick video showing the whole procedure:
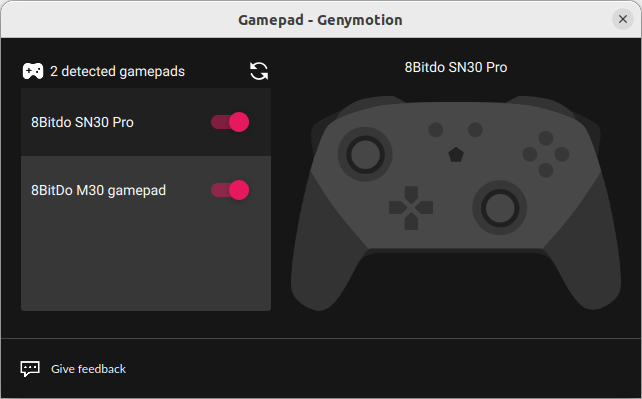
Gamepad 
3.8.0 Paying
To enjoy an immersive gaming experience with Android games or to test how your app interacts with a gamepad, you can use a gamepad connected to your computer on Android 12.0 and higher.
Click to open the Gamepad widget:
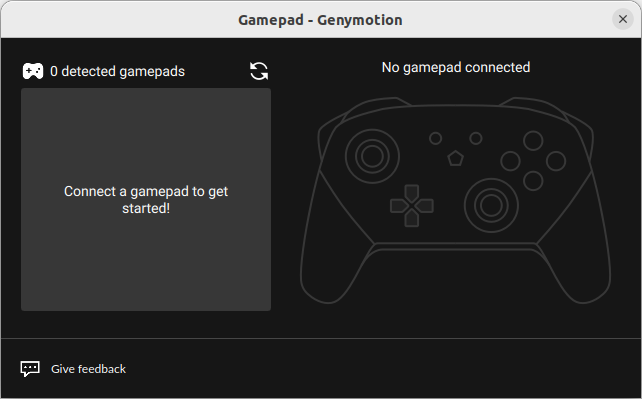
If one or more Gamepads are detected, their name will appear in the device box on the left:
Note
If no Gamepad appears when connected, try clicking to refresh. If it still does not appear, it may not be compatible with Genymotion, see compatible summary below:
| Gamepad | Windows | macOS | Linux |
|---|---|---|---|
| XBox 360 | 🟢 | 🟢 | 🟢 |
| PS5 | 🟠 Possible solution | 🟢 | 🟢 |
| Generic USB | 🟢 | 🟢 | 🟢 |
Then you can:
- Use the switch to toggle each Gamepad input on or off in the virtual device.
- Select which Gamepad to preview, if more than one is connected.
PS5 Gamepad on Windows
The PS5 DualSense gamepad is not yet recognized by Genymotion on Windows. However, several tools are available online that can make it appear as an Xbox 360 gamepad. These tools work well with Genymotion.
Motion Sensors 
3.8.0 Paying
The Motion Sensors widget allows you to simulate Android motion sensors.
Click to open the widget window:

There you can simulate the device position in space by:
- using the sliders, in the right section of the window, to set specific Yaw, Pitch and Roll values from -180° to 180°.
- selecting a specific rotation angle in the Device rotation field.
- moving the device with your mouse in the left section of the window: left click and hold on the device 3d model, and move your mouse to rotate the device.
Android motion sensors, Accelerometer, Gyroscope and Magnetometer, values are displayed below the device 3d model.
You can also toggle Enable emulator window rotation if you wish to rotate the device display window in accordance with the motion sensors values you set.
The GESTURES feature is not available for now, but if you are interested in this feature, you can select this tab and vote for it.
With a linked physical device
It is also possible to connect an Android physical device. To do so, click on Setup device link and follow the instructions detailed in Device link feature.
Once linked, your device will appear as connected:
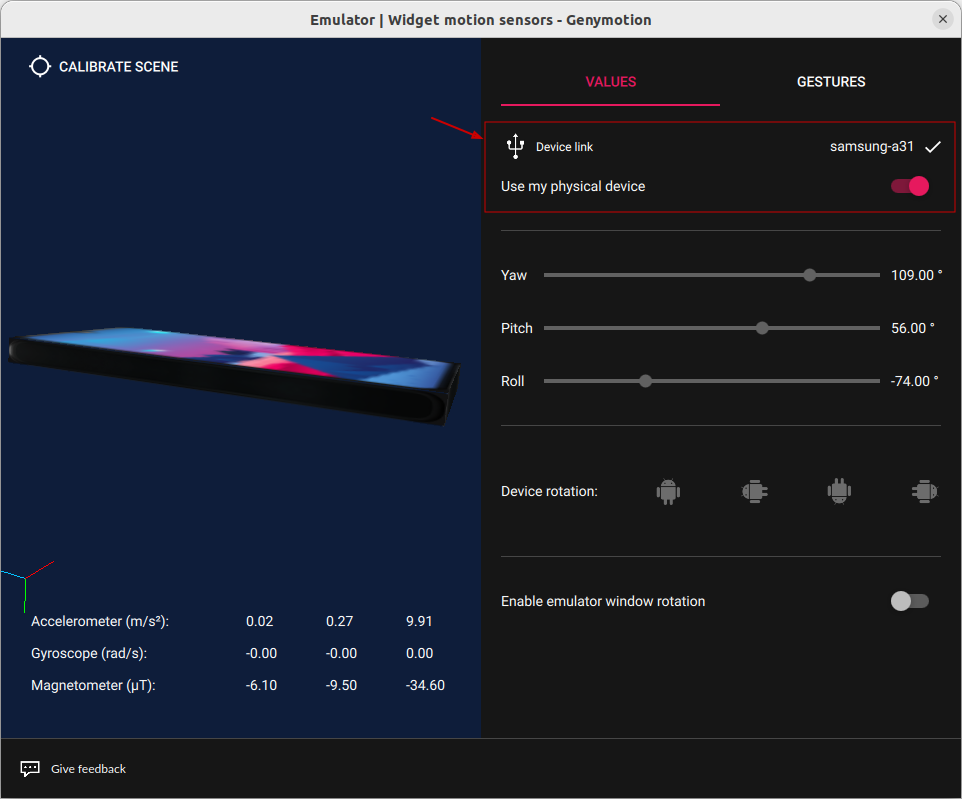
The sensors will display the values of your real physical device and the 3d model in space will be synchronized with your device motion sensors value.
Hold your smartphone vertically in front of you and click on CALIBRATE SCENE to synchronize the 3D with your smartphone position in space.
You can toggle this feature by using the toggle button next to Use my physical device.
Note
By default, the emulator window will not rotate when the smartphone suggests so (for conveniency purpose). To enable rotation, the Enable emulator window rotation option must be enabled in the Motion sensor widget.
Settings
Click to open the extra settings window:
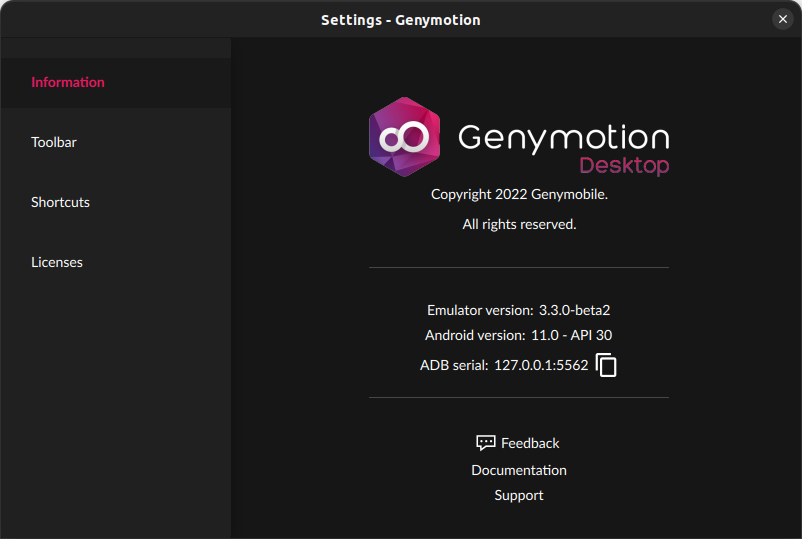
Information
In this section, you can find information related to Genymotion and your virtual device:
- Emulator version: Genymotion version.
- Android version: the Android version of the virtual device.
- ADB serial: the ADB serial (local IP and port) of the virtual device.
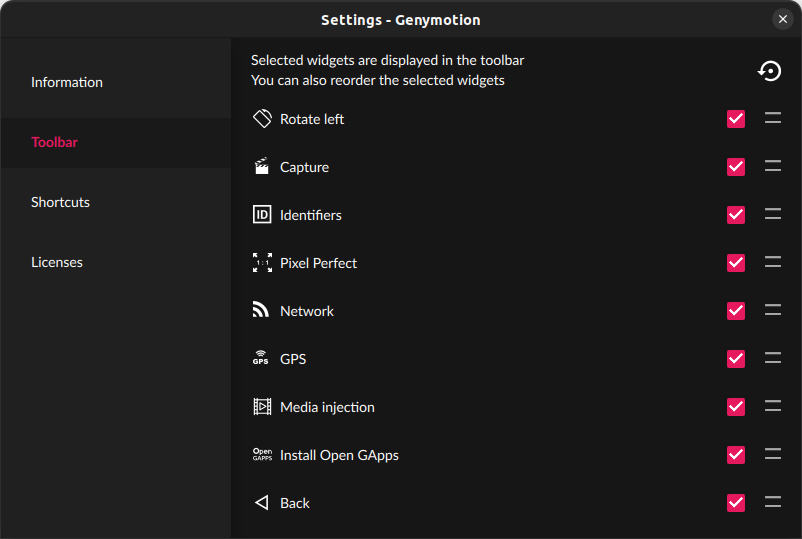
Toolbar
You can click in the right-side toolbar to reach this feature.
With this feature, you can:
- Select which widgets to display in the right-side toolbar by checking them.
- Drag'n drop the widgets to change their order in the right-side toolbar.
- Click to reset to default.
Shortcuts
This feature allows you to change the default virtual device shortcuts and add custom shortcuts:
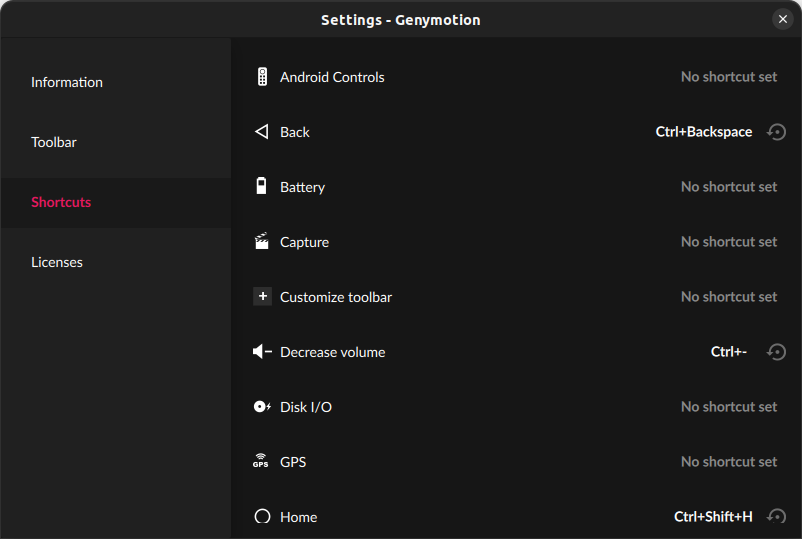
-
Click on a feature to create or edit a shorcut:
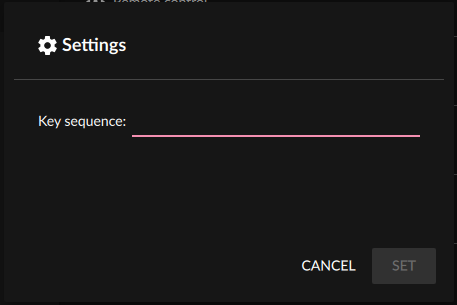
-
Press a key sequence (for example, Ctrl+A) and click SET to confirm.
Click to restore the default value.
Device link 
With the Device Link feature, you can use a smartphone as an emulation companion for your development. It allows you to:
- Forward touch event from your smartphone to the emulator.
- Mirror emulator screen on your smartphone.
- Forward smartphone sensors to the emulator (precisely accelerometer, gyroscope and magnetometer). See Motion sensors widget Paying
As a result, you can test your application as if you were holding a device in your hands.
To use Device Link, open the settings window:
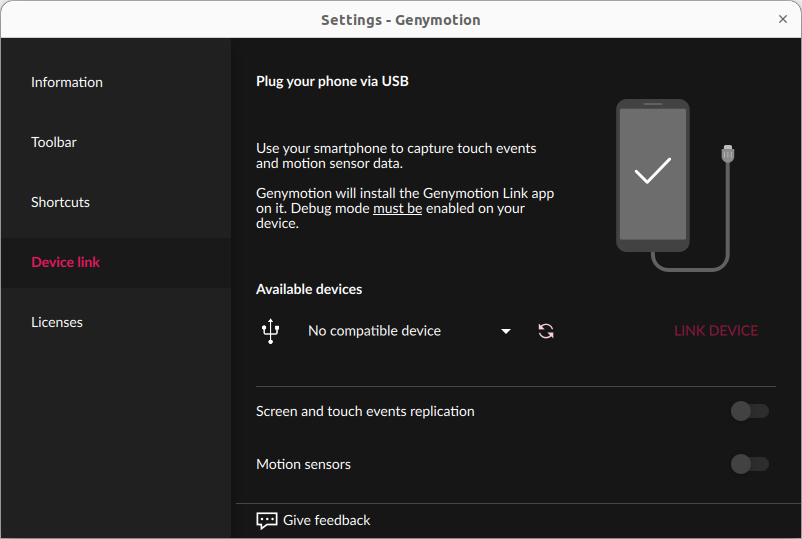
Connect your smartphone to your computer, ensure USB debugging is enabled. Please refer to this article for detailed instructions. You may also need to configure your system to enable ADB connection through USB. See Set up a device for development for detailed instructions.
Do it wirelessly
You can also use ADB wirelessly but you need to setup the latest Android SDK in Genymotion.
Once your smartphone is ready and connected via USB to your host computer, click on to refresh the list, it will appear in the Available devices section:

Click LINK DEVICE to proceed: this will install the Genymotion Link app on your device and automatically open it.
When completed, you should see your virtual device display on your physical device screen, and it should appear as "Device linked":
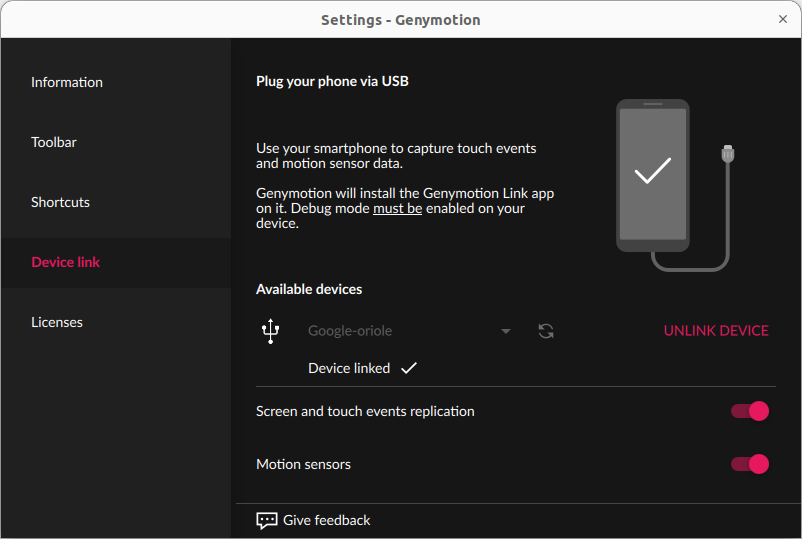
You can then use the toggle switches to:
- Disable or enable screen and touch events replication.
- Disable or enable motion sensors connection (cf. Motion sensors Paying)
Licenses
Displays the licenses of Genymotion open-source components:

Click COPY to copy the full text of the license.
Other controls
Sound Control
Click or to control the volume of the sound emitted by your virtual device.
Rotate Screen
Click to rotate the screen 90° to the left, or click to rotate the screen 90° to the right.
Pixel Perfect
With Pixel Perfect, you can be highly precise in the development of your user interface and ensure every pixel of your application really looks as it should. One pixel of the virtual device is displayed using one pixel of your computer screen.
Click to enable or disable Pixel Perfect.
If the virtual device screen size is larger than your computer screen size, the virtual device window will be maximized and you will be able to use scrollbars to move inside the screen.
Navigation
The navigation widgets simulate a real device navigation buttons:
- Click to bring the Android Recent Screen and list recently accessed activities and tasks.
- Click to navigate to Android Home page.
- Click
to simulate the
Backbutton of a real device.
Power
The power widget simulates a real device power button:
- Click to put the virtual device to sleep.
- Click and hold your mouse button to simulate a power button hold (reset/power off).