Virtual Devices Settings
Genymotion Desktop comes with a Graphical User Interface (launchpad) which allows you to configure, launch and manage your Virtual Devices.
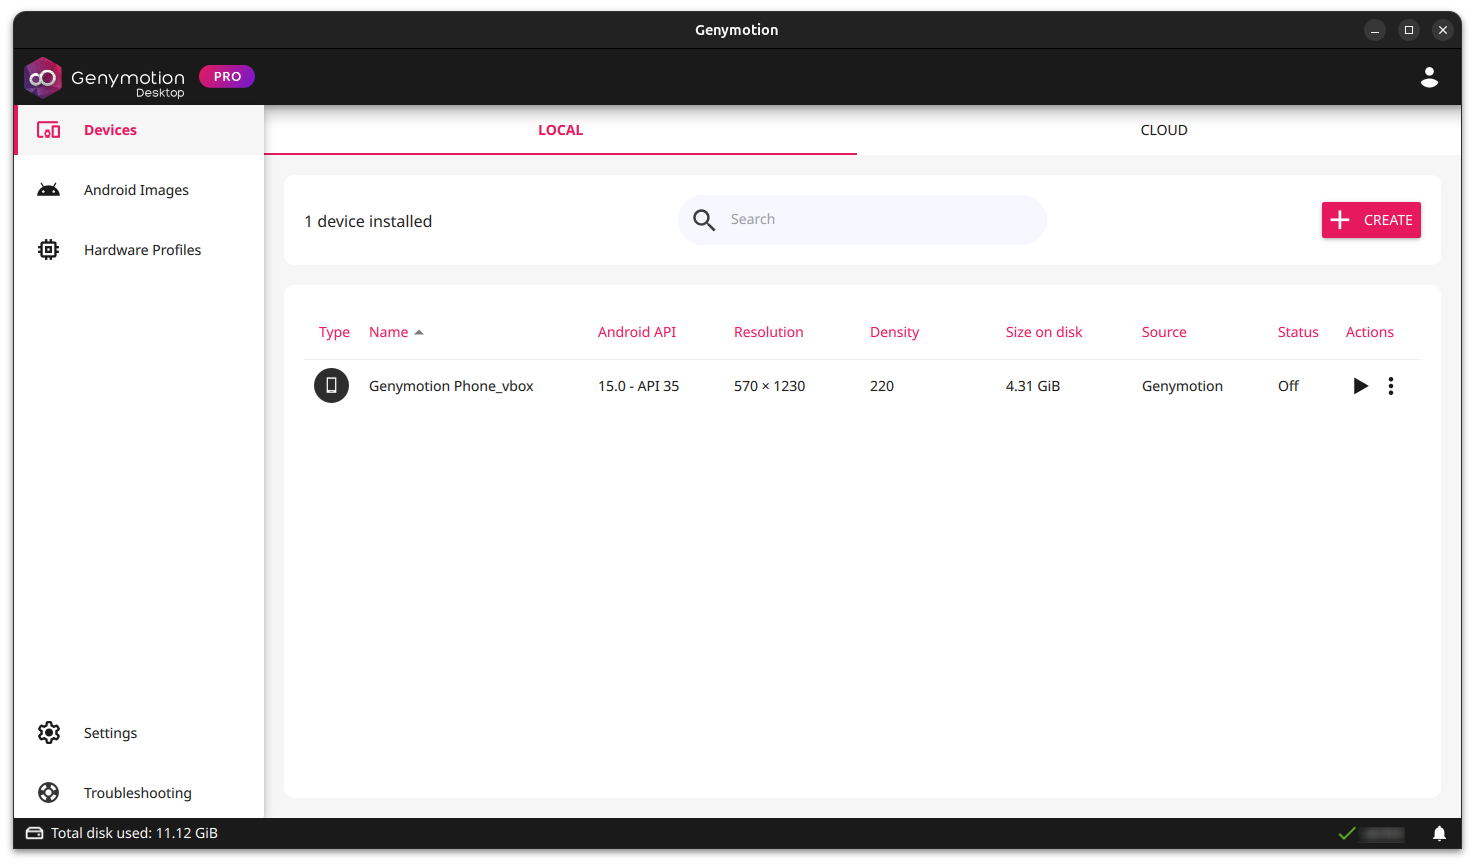
Managing virtual devices
Your installed Android virtual devices are displayed in Genymotion Desktop launchpad dashboard:
Start a virtual device
Quick boot
Quick boot is only available with QEMU hypervisor and it is not supported on Windows systems yet.
You can quick boot a virtual device using one of the following methods:
- Double-click on the virtual device
- Click
- Right-click on the virtual device and select Quick boot
- Click and select Quick boot
If Quick boot is not available, all these methods will default to Cold boot.
Cold boot
To perform a cold boot, right-click on the virtual device, or click , and select Cold boot.
Configure a virtual device
Right-click on the device, or click , and select Edit. This will open the Virtual Device Configuraiton Window. From there, you can change the Virtual Device name, system settings, and more.
Summary
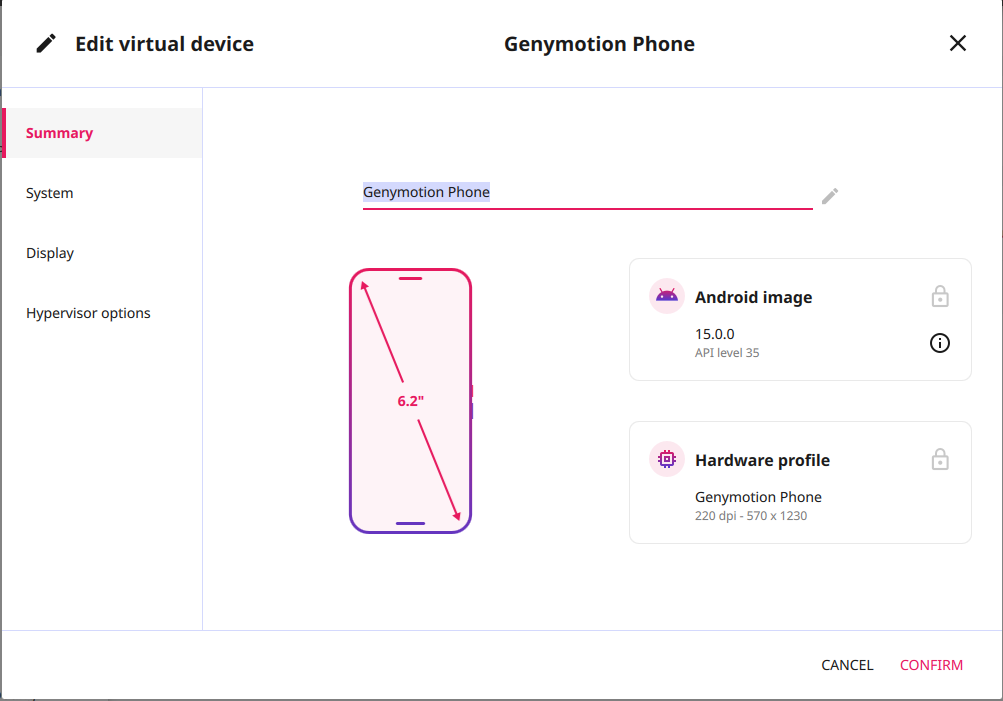
This tab displays a summary of the virtual device Android image and harware profiles. You can change the name of the device here.
The Android image and Hardware profiles can only be modified when creating a new device.
System
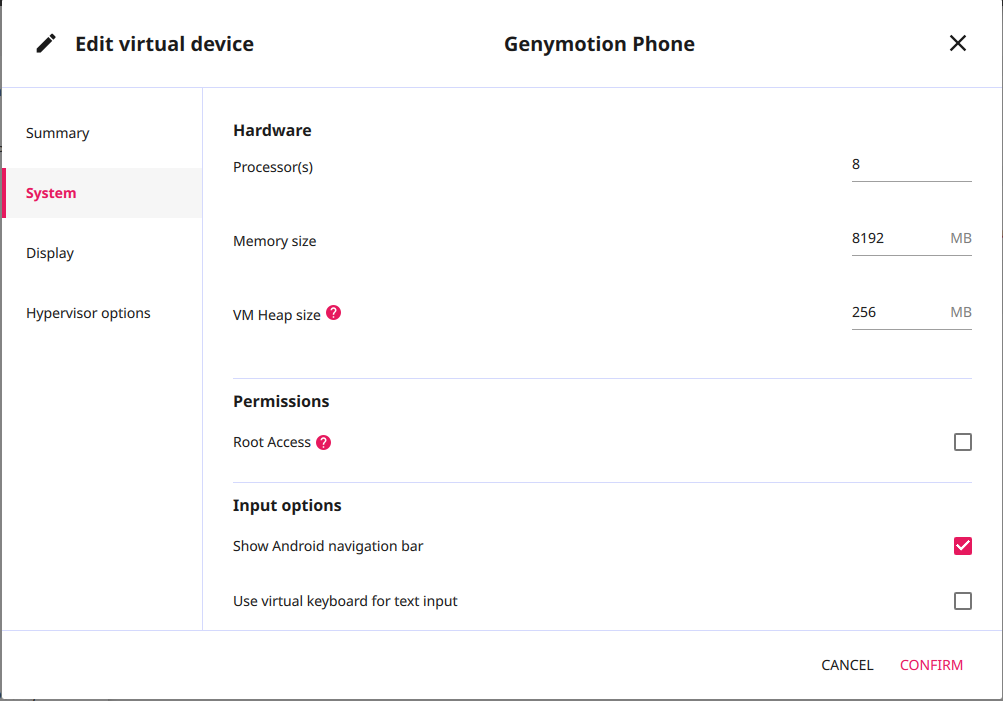
In this section, you can change the following system settings:
-
Hardware:
-
Processor(s): Sets the number of processors used by the virtual device. Default value is the recommended one for an optimal use.
When defining more processors than default, we advise setting one less than the total amount of processors to leave one dedicated to the host and avoid performance and stability issues.
-
Memory size: Sets the memory space allocated to the virtual device. The value must be below the memory of your computer and take into account the memory space used by your computer.
Set the values recommended for the real devices (512MB to 2048MB) for optimal result.
-
VM Heap size: Sets the amount of memory allocated by the Java Virtual Machine (JVM) per application. Default value is 256MB.
Use bigger values if you wish the garbage collector to run less frequently.
-
-
Permissions: Toggle root access. Please refer to Root toggle feature for more information.
- Input options: Toggle Android navigation bar and virtual keyboard.
Display
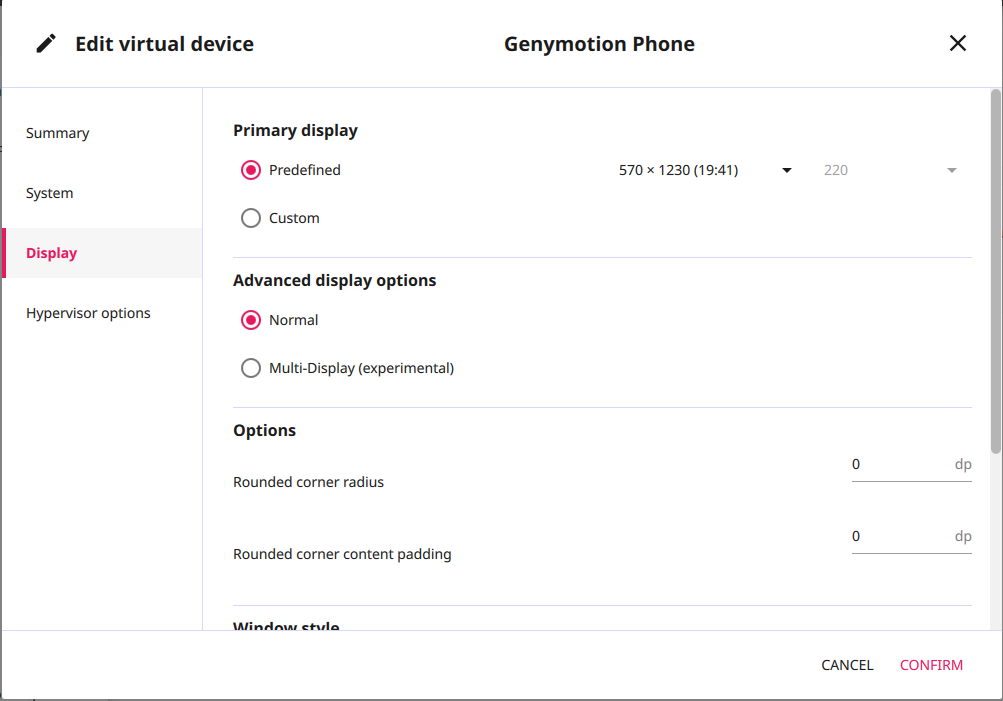
-
Primary Display: Sets the screen size and density of the device primary display. You can either select a predefined resolution from the drop-down list, or set a custom resolution.
You may experience display or performance issues when using custom screen size and density values.
-
Advanced display options:
- Normal: Standard single display.
-
Multi-Display: Add external displays to the device. Click to add a display, or to remove one:
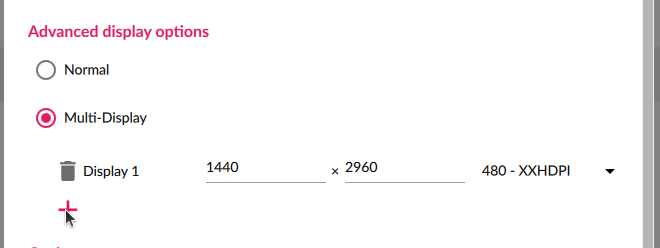
The number of additional display depends on the Android version. Additional displays are not available with Android 9.0.
This feature is still experimental and does not work properly on Android 13.
-
Options:
- Rounded corner radius: Set radius of the display corners to add a rounded effect. Value must be set in density independent pixels (
dp). - Rounded corner content padding: Set the padding of the rounded corner content. Value must be set in density independant pixles (
dp).
- Rounded corner radius: Set radius of the display corners to add a rounded effect. Value must be set in density independent pixels (
-
Window style:
- Windowed (default): Run the device in a system window.
- Full screen: Run the device in fullscreen.
-
Skinned: Use a skin as Window decoration. Select a skin in the drop-down list. There are four default skins:
phone-1(9:16),phone-2(3:5),tablet-gaming-1(8:5) andtablet-gaming-2(8:5) but you can also create your own custom skin .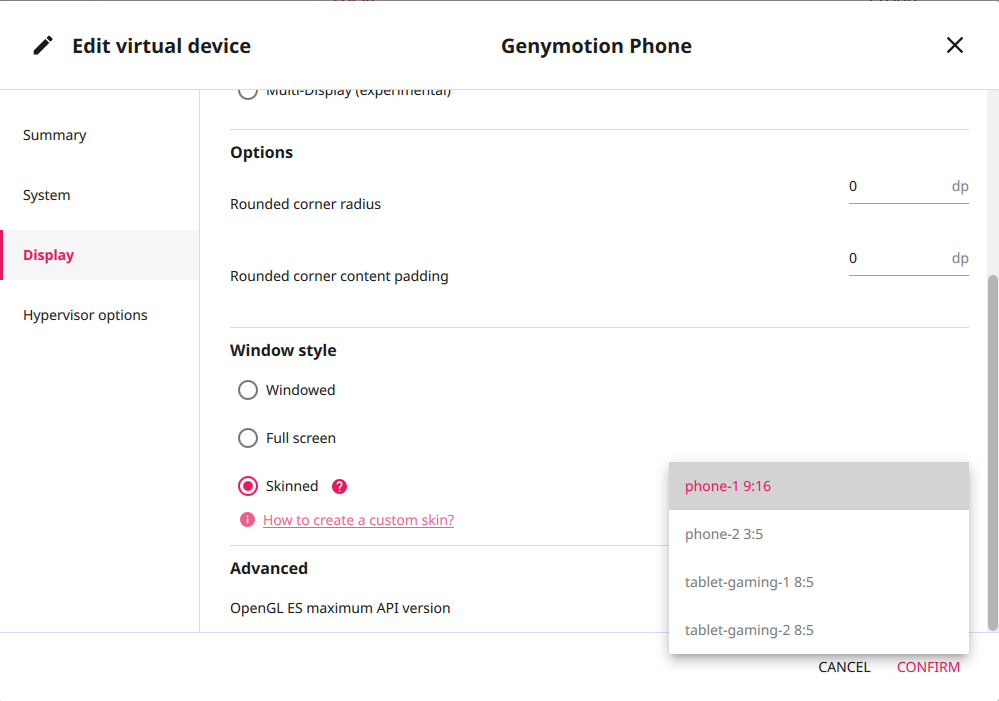
-
Advanced: Force the OpenGL ES maximum API version (default:
3.1).
Hypervisor Options
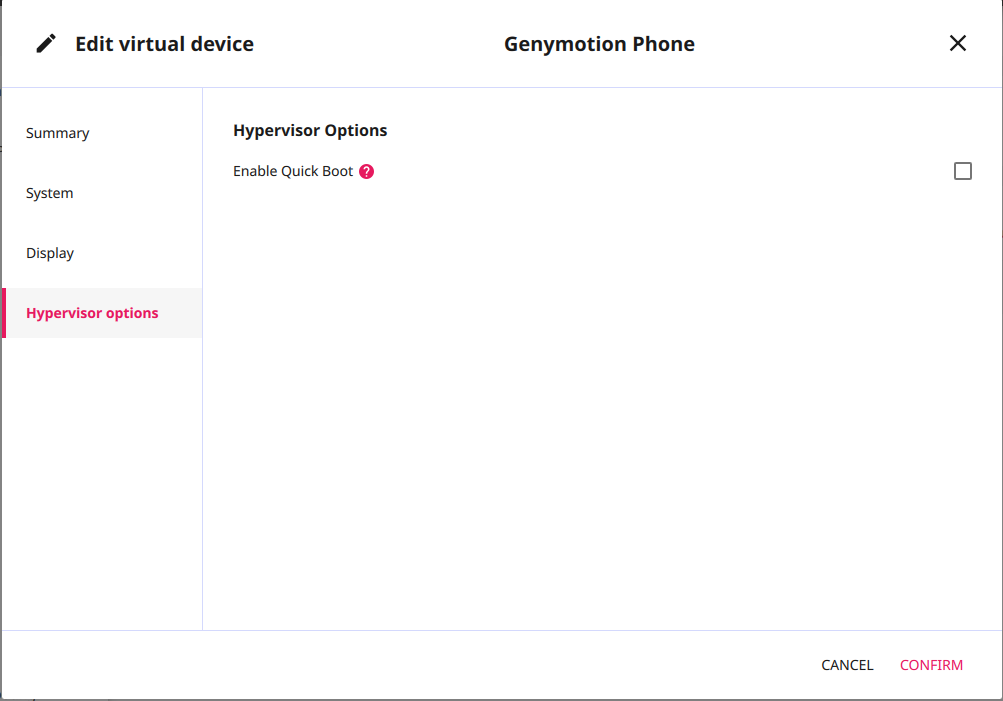
Check or uncheck Enable QuickBoot to toggle quick boot with QEMU.
Quick boot may cause various boot and stability issues, leave it disabled if unsure.
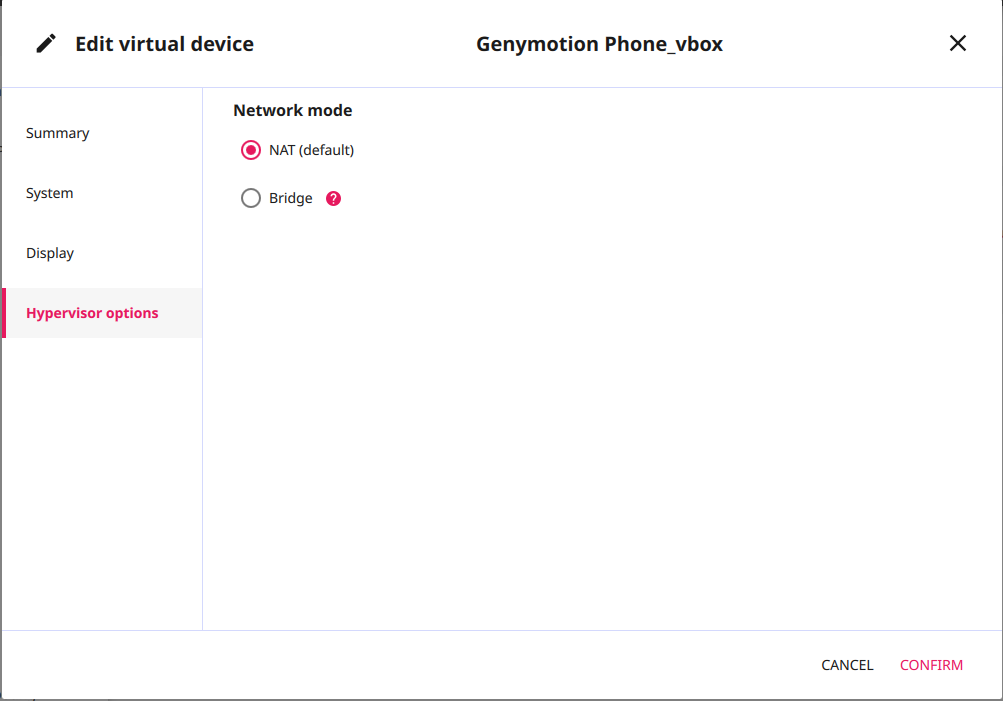
Set VirtualBox Network mode:
- NAT (default): Network Address Translation (NAT) is the simplest way of accessing an external network from a virtual device. It does not require any configuration on the host network. For this reason, it is the default networking mode.
-
Bridge: In Bridged mode, the virtual device is a full participant in the physical network. It can contact other machines on the network and can be contacted by other machines as if it were a physical computer on the network.
In Bridged network mode, you must select the interface on which you want to apply the bridge and the network needs to have a DHCP server or router to provides a valid IP address for the virtual device. Learn more
Other
Right-click on the device, or click for more options:
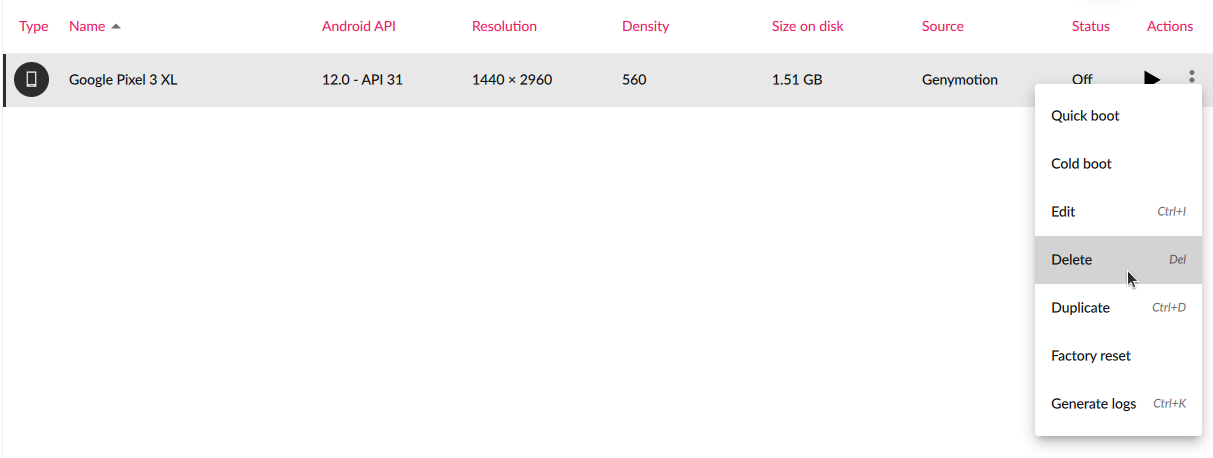
Apart from the options covered before, you can also perform the following actions:
- Delete to delete a device.
- Duplicate to copy a device.
- Factory reset to reset a device to factory settings.
- Generate logs to generate device specific logs.
Interacting with virtual devices
This chapter describes features that help you easily interact with your virtual devices.
Multi-touch gestures
Touchscreen
Genymotion Desktop supports touchscreen: touch and multi-touch can now be performed on your touchscreen, as on a real mobile or tablet device.
With mouse and keyboard
If you don't use or have a touchscreen, multi-touch is also simulated with the mouse and keyboard:
| Windows/Linux | macOS | |
|---|---|---|
| Zoom in | Ctrl + | |
| Zoom out | Ctrl + | |
| Tilt forth | Ctrl + | |
| Tilt back | Ctrl + | |
| Rotate clockwise | Shift + | Shift + |
| Rotate counterclockwise | Shift + | Shift + |
Copy and Paste
The clipboard is shared between your computer and Genymotion Desktop. Thus, you can easily copy and paste text from your computer to Genymotion Desktop, and vice versa.
Clipboard sharing can be disabled in Genymotion global settings - see Clipboard sharing.
Drag'n Drop
Drag and drop a file to the virtual device display to install or upload it. The behavior of dragged and dropped files is different according to the file type:
.apkfiles (Android applications): APK files are installed on the virtual device. If the same application already exists but with another signature, you can decide to override the existing application. See Install Applications.-
.ziparchives (flashable archives): Zip archives detected as flashable (i.e. containing a/systemfolder) are flashed on the device.Flashable archives may damage your virtual device. We recommend making a backup of the device (cloning) before flashing it.
-
Other (regular files): Regular files will be uploaded to
/sdcard/Download. They can be accessed via the Amaze or File Explorer applications provided in the virtual device.
Display tips
When navigating within a virtual device, you can:
- toggle full-screen: Press Ctrl+Shift+F or Ctrl+Fn+F on macOS.
- resize the virtual device display window: Select and dragg an edge or a corner of the window.
- fit to content: When the virtual device window is resized, black areas appear on the borders. Double-click in one of those areas to fit the virtual device window size to its content.
Generating logs
In some cases, notably for assistance purposes, you may need to generate a log archive:
-
From Genymotion launchpad, navigate to Troubleshooting and select Generate logs.
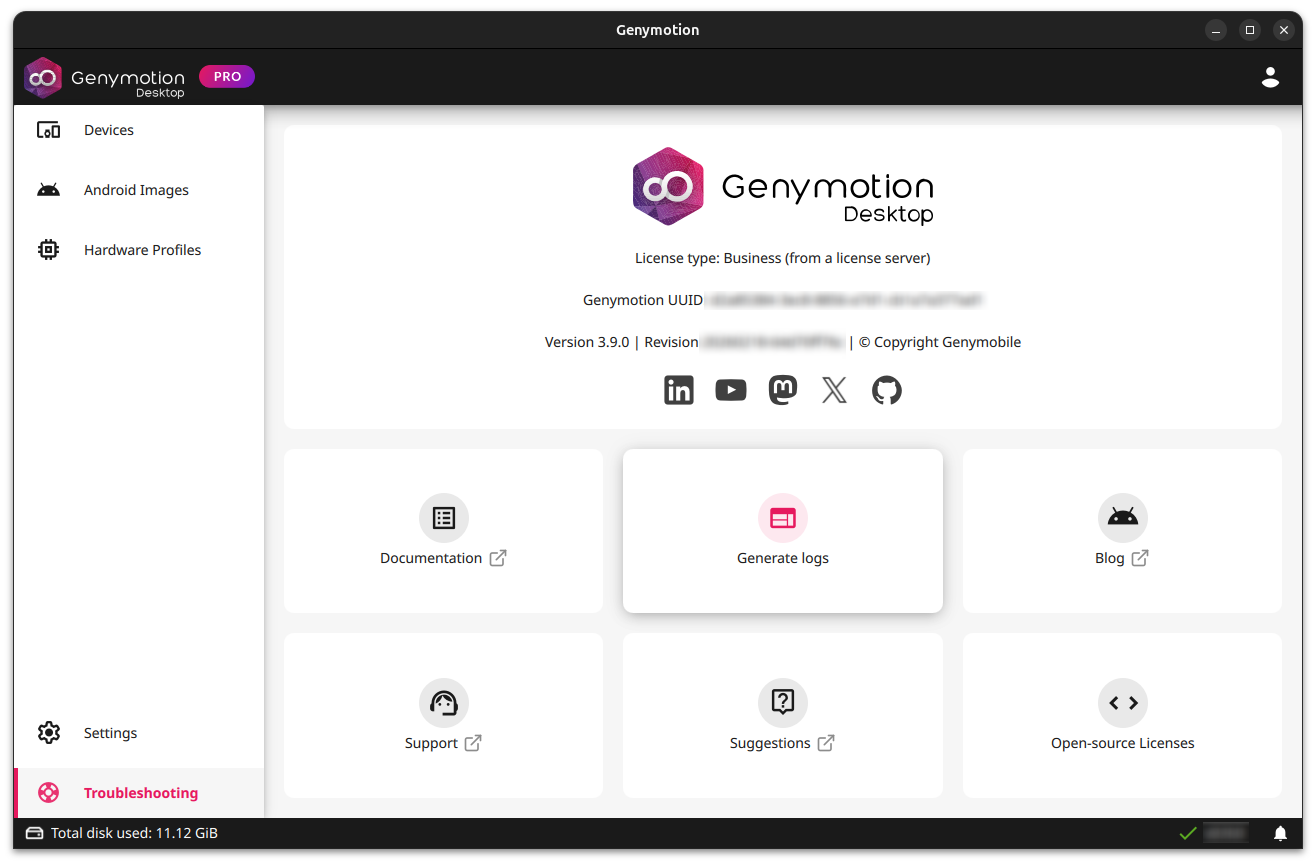
-
Select the path to save the generated archive.
- Wait until the archive is generated and click Close.
To generate logs for a single virtual device, right-click on the device, or click , and select Generate logs.
Virtual device shortcuts
Shortcuts can be viewed and customized in the Settings widget.
For shortcuts related to the use of Genymotion Desktop itself, please refer to Genymotion Desktop shortcuts.