Basic Steps
In this section, you will find the basic steps to setup, launch, use and save a virtual device instance.
Start virtual devices
Closing your web browser or logging out will not stop your running virtual devices. They have to be stopped manually or they will keep running until the Frontend inactivity timeout or the maximum run duration are reached.
Warning
- By default, no timeout happens for virtual devices started with gmsaas. You must specify the
--stop-when-inactiveoption, or they will keep running until manually stopped. - Changes are not automatically saved - see save a virtual device.
Quick-start
From the Virtual devices page, click  and search for the official or custom recipe you wish to use. A virtual device will be created and automatically launched with the selected recipe:
To see all the recipe properties, navigate to the Recipes page.
From a recipe
- Navigate to the Recipes page.
- Click on the recipe card you wish to use.
A new device with the selected recipe will be created and launched automatically, and you will be automatically redirected to the Virtual devices page:
Access a virtual device display
From the Virtual devices page, double click on the virtual device or hover the mouse over to it and click :
Stop a virtual device
Closing your web browser or logging out will not stop your running virtual devices. They have to be stopped manually or they will keep running until the Frontend inactivity timeout or the maximum run duration are reached.
To stop a running device, click Stop from the device display left bar menu:
You can also stop it from the Virtual devices page; hover the mouse over to the desired virtual device and click :
If you are an organization manager, you can also stop a running virtual device even if you are not its owner. Select Message owner to notify the device owner.
Save a virtual device
Changes are not automatically saved. As a result, any modification to a virtual device has to be saved manually.
Save as a new custom recipe and custom image
If you started a virtual device from an official recipe, you can save it as a custom recipe and custom image:
- From the virtual device display, click Save in the left bar menu.
- Give a name to your custom recipe and custom image.
- Click CREATE.
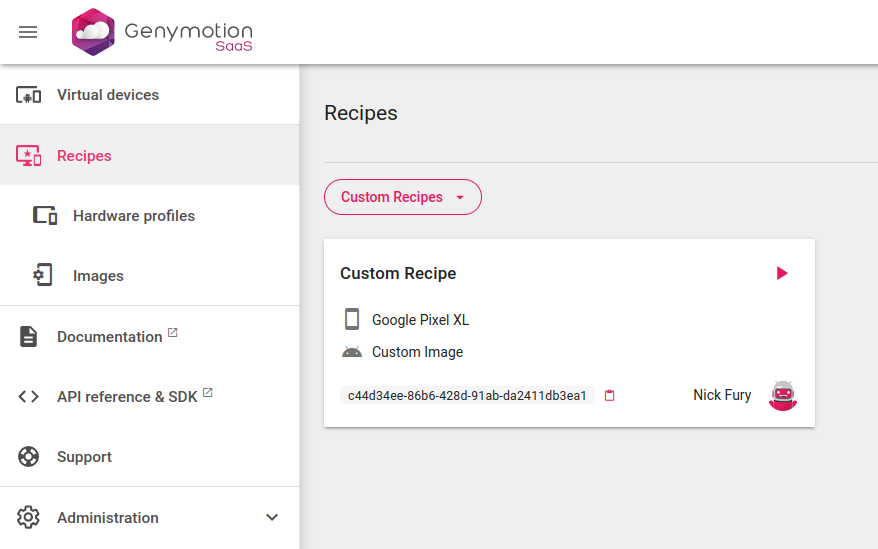
The newly created custom recipe can be found in the Recipes page:
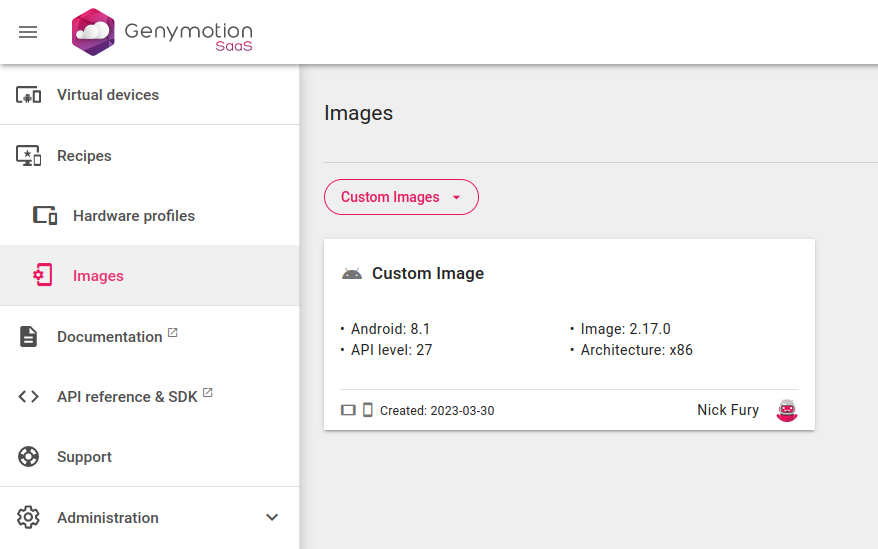
and the new custom image in Recipes > Images:
You can also do it from the Virtual devices page page:
- Hover the mouse over to the desired virtual device and click
- Name your new custom recipe and custom image click CREATE
This will stop the running virtual device and start the saving process. Your recipe will then appear as Saving until the process is complete - this may take a few minutes:
Once finished, your new custom recipe will appear in the the Recipes page, and the new custom image in Recipes > Images.
Update a custom recipe
To save changes of a virtual devices created from a custom recipe, click Save in the left bar menu. You can either save the changes to your current custom recipe, or create a new custom recipe:
You can also do it from the Virtual devices page page:
- Hover the mouse over to the desired virtual device and click
- Select Update recipe to update the current custom recipe
Your recipe will appear as Saving until the update is complete. This can take a few minutes.
You can also select Create new recipe if you wish to create another custom recipe and custom image.
Deploying an application
If the installation of an application fails, or if it is not available in Google Play Store (Your device isn't compatible with this version), it probably means that you are not using the correct image architecture. See Applications for ARM for more details.
To deploy an application to a virtual device, you first need to launch a new device from an official or custom recipe. Then, use either one of the following methods to deploy your application:
Access the virtual device display, then drag and drop the application APK into it:
Open the File Upload widget to upload and deploy the APK file into the virtual device.
Google Apps are not installed by default - you need to install the Open GApps package and Google Play Store will be available.
Connect ADB to your virtual device with gmsaas and run the following command to sideload your APK file:
adb install <application.apk>
Installing Open GApps
The application you are developing or testing may require an interaction with Google Play Services (e.g.: in-app purchasing, advertising, etc.). However, for Intellectual Property reasons, Google Apps (Gmail, Drive, Calendar...) and Google Play services are not included in Genymotion virtual devices by default. You need to install the Open GApps package.
We assume no liability whatsoever resulting from the download, install and use of Google Play Services within your virtual devices. USE AT YOUR OWN RISK!
- From your running virtual device display, click on the File upload widget and INSTALL OPEN GAPPS.
- Click INSTALL
- Wait for the package to upload and install.
- When done, you will be prompted to reboot the virtual device.
- (Optional) Open the Play Store and configure your account.
If an application is not available or cannot be installed from Google Play Store (Your device isn't compatible with this version), it is probably only available for ARM. See below for more details.
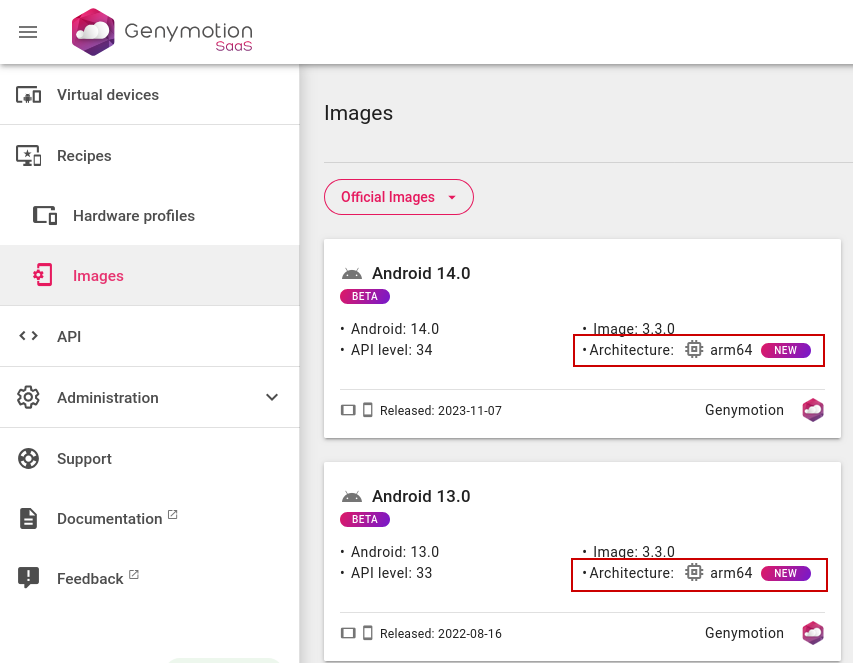
Applications for ARM
Most modern applications, especially games, are only available for ARM64: they will not install or run if you use an x86 or x86_64 image.
You need to create a custom recipe with an arm64 image:
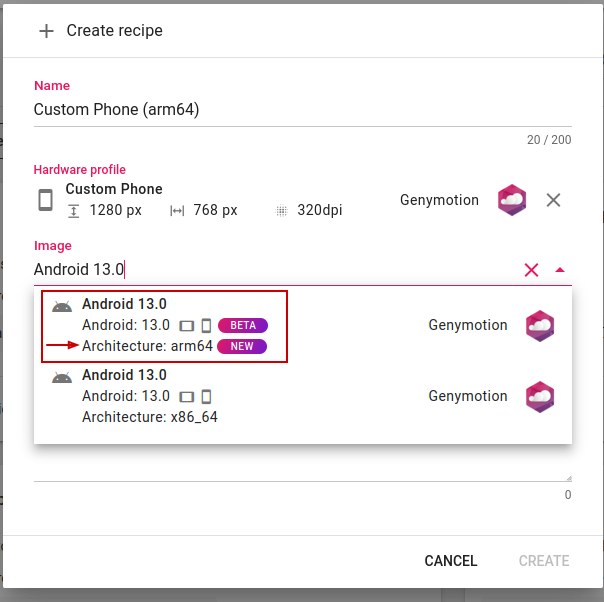
Then start an instance from this recipe and install the application as described previously.
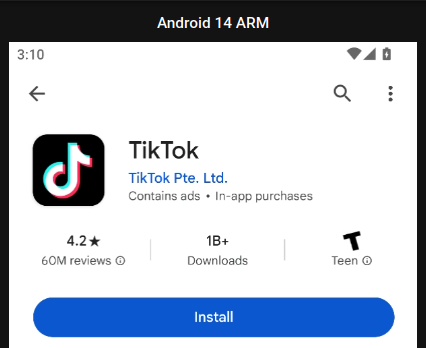
If you use Google Play Store, you will notice that arm-only apps, such as TikTok, are now installable: