Get Started with Genymotion SaaS
![]()
![]()
Genymotion SaaS is our solution to run Genymotion in the Cloud, on our own servers.
Requirements
For best result and compatibility, we recommend:
- Google Chrome
- Mozilla Firefox
There are known compatibility issues with Safari. Mac users should use Google Chrome instead.
Network Security
To communicate with our servers, make sure the following rules are allowed in your network firewall:
- Outgoing TCP port 443 on cloud.geny.io
- Outgoing TCP port 443 on api.geny.io
- Outgoing TCP/UDP port 443 on turn.genymotion.com
- Connection TCP∕UDP port 443 on ws.geny.io
- Connection to websockets (wss)
If you, or your company, use a proxy, make sure HTTP CONNECT on port 443 is allowed. If it is a SOCKS v5 proxy, make sure UDP ASSOCIATE is allowed too.
First steps
To start using Genymotion SaaS, you need a Genymotion account. If you don't have one, please follow the steps below to create one.
Create an account
Go to https://account.geny.io/signup to create an account, or use Single Sign-On (SSO) option if you have a Gmail or Github account:
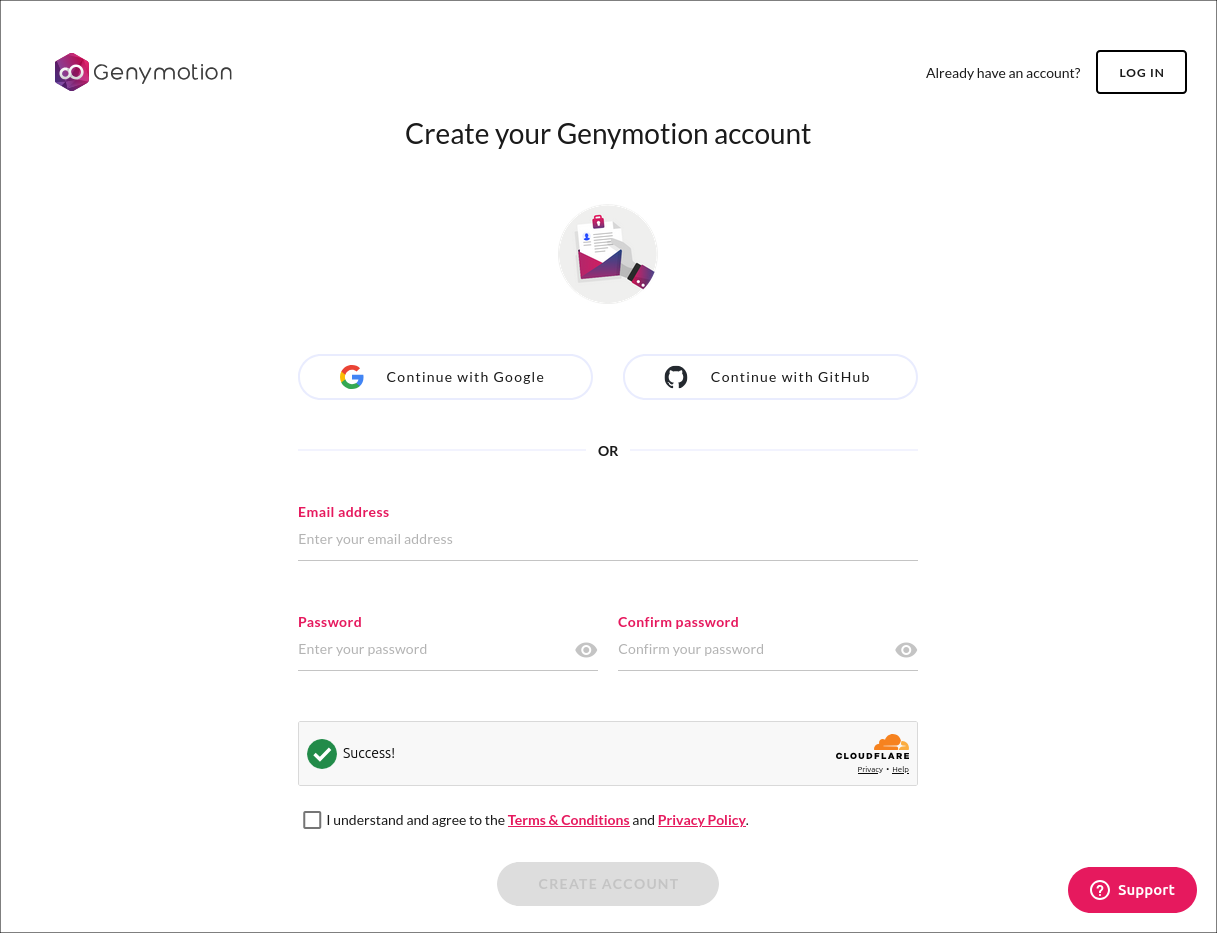
Temporary email (also known as disposable) providers are not allowed for registration.
If you use Single Sign-On, you will be directly redirected to the account confirmation page:
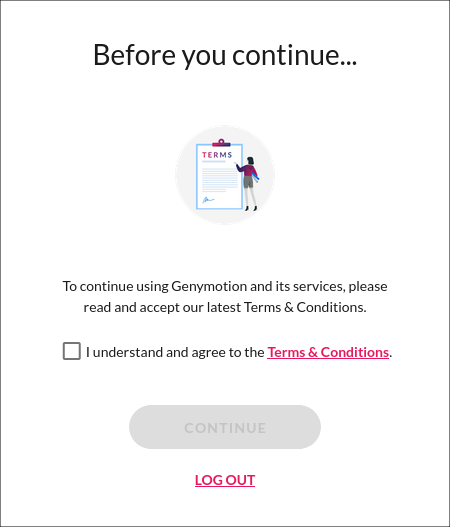
Read the Terms and Conditions carefully, check "I undersand and agree to the Terms & Conditions" and click CONTINUE to proceed.
Note
You will also receive an account creation confirmation email: 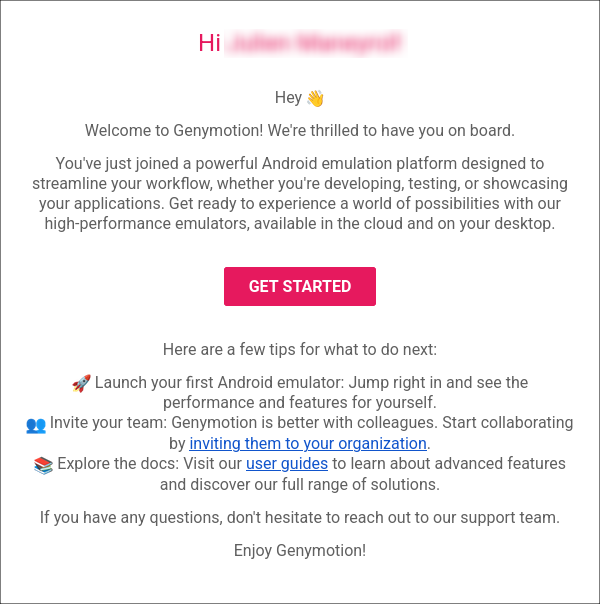
If you do not use Single Sign-On, a verification email will be sent to the email address you provided in order to activate your Genymotion account:
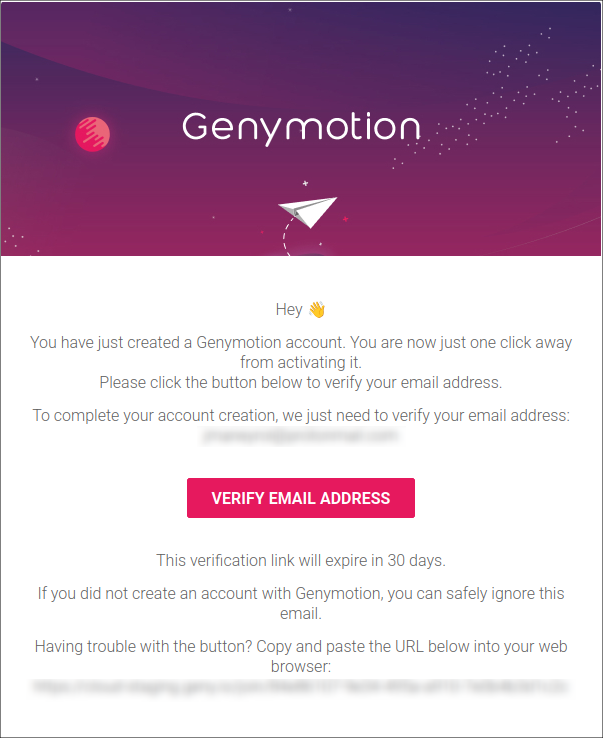
Click on the VERIFY EMAIL ADDRESS button to activate your account. You will be redirected to the account confirmation page:
Read the Terms and Conditions carefully, check "I undersand and agree to the Terms & Conditions" and click CONTINUE to proceed.
Log in
Once your account has been created and activated, you can log in at https://account.geny.io/signin with your credentials or using Single Sign-On (SSO):
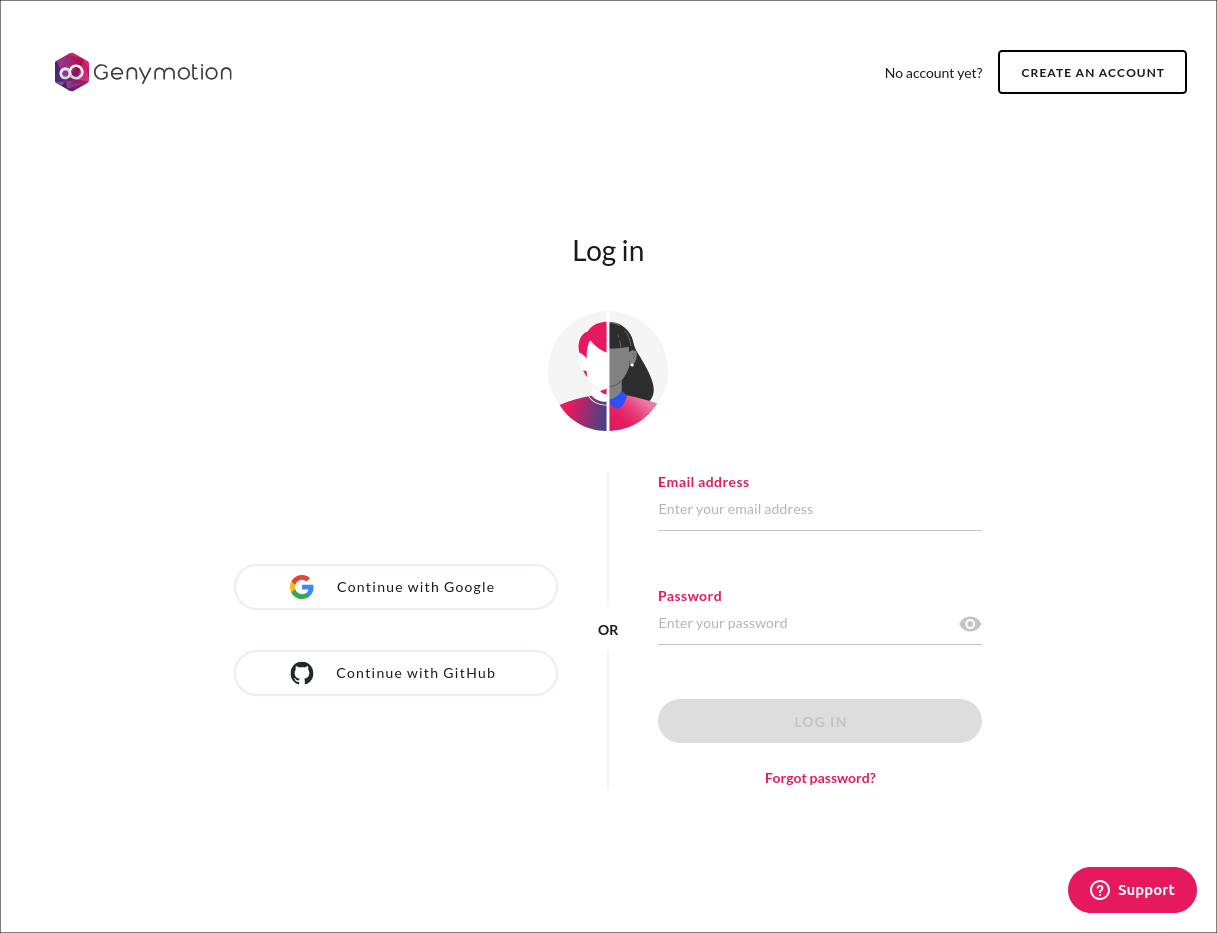
The Forgot Password? link allows you to change your password, if you created an account with an email. If you created your account with SSO, you can also use it to set a password to your account: you will then be able to either log in with SSO, or with your email and password.
If you have been invited by a manager and wish to use SSO, you must use the same account as the one in the invitation.
Start a plan
A free 60 minutes trial is available on request. Learn more
Genymotion SaaS offers multiple subscription plans. To subscribe to a plan, follow these steps:
- Log in at https://account.geny.io/signin
- Navigate to Plans & Billing in the left sidebar.
- Click on SUBSCRIBE NOW in the "Genymotion SaaS" section. This will open a popup window.
- Choose the plan you want to subscribe to. For more details about available plans, please refer to Pricing.
By default, the datacenter is set to North America. You can change it from the Administration panel. For more details, please refer to Manage Datacenter Location
Quick-Start a Virtual Device
- From the Virtual devices dashboard, click

- Search and select the recipe you wish to use and click START
