Administration Interface
The administration interface is available only for the manager of the organization.
To open the administration interface, go to Administration in the left bar menu.
Dashboard
This page is your organization main dashboard:
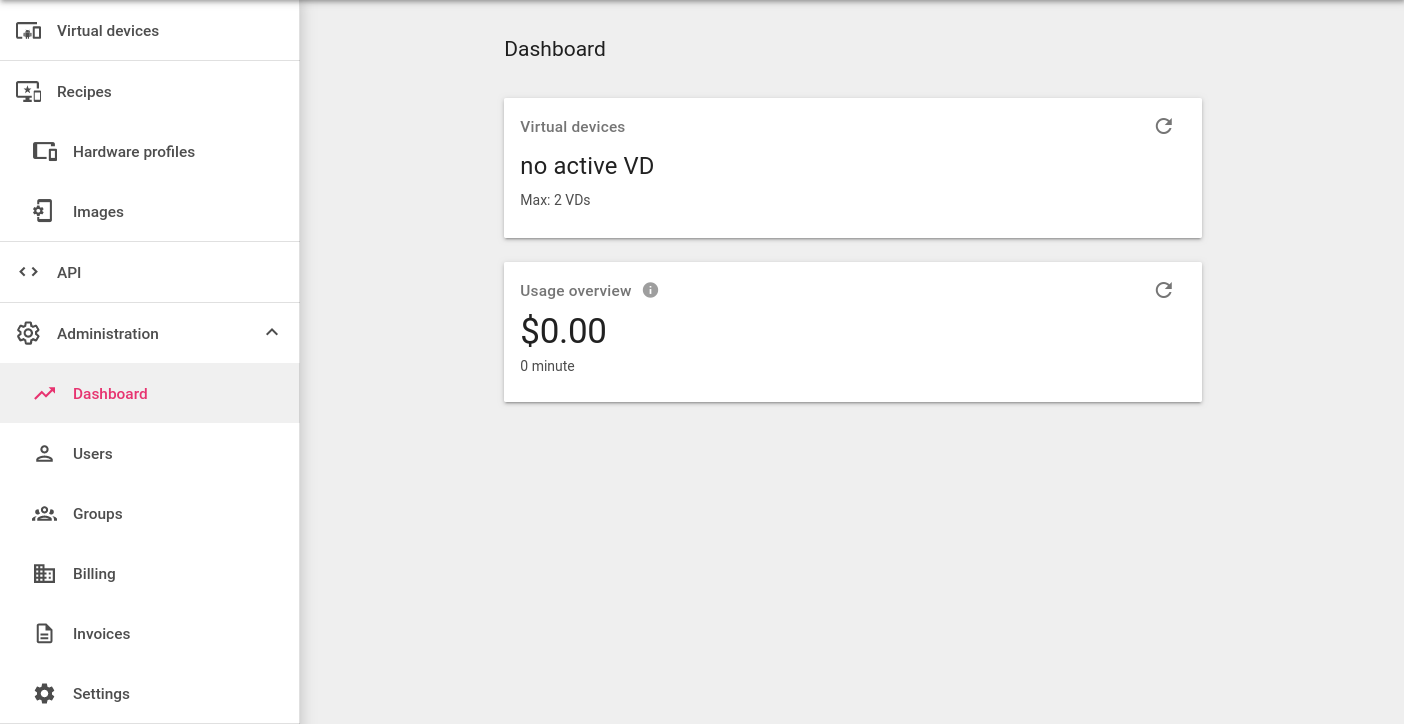
- Current usage: this section displays the number of active (running) devices and other information related to your current subscription.
-
Usage history: in this section, you can export your organization's users consumption data for a selected date range, with the number of instances started and total runtime used per user in CSV or XLSX formats.
Click to set the time period, and click to export the data.
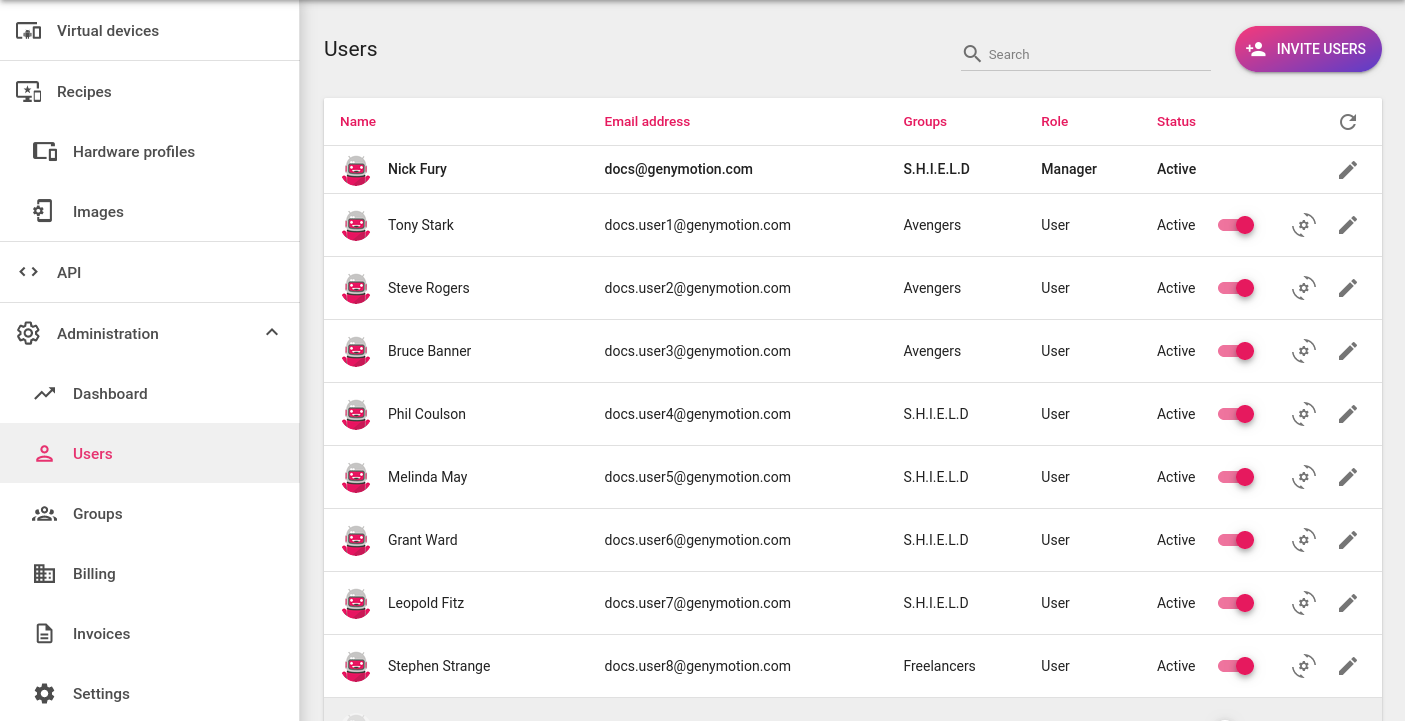
Manage users
You can view and manage your organization users in the Users page:
Adding users to your organization
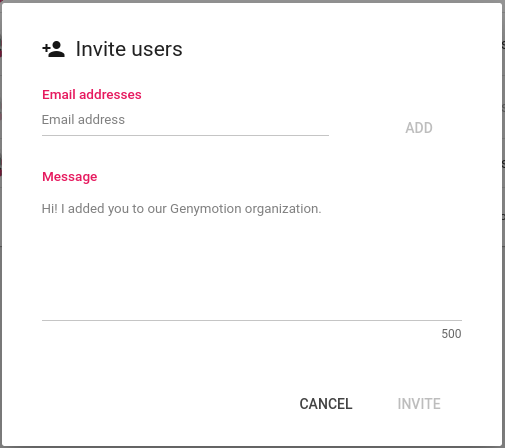
To add users to your organization, click  :
:
Then:
-
Enter the recipient email address in the Email addresses field and click ADD or press Enter. Repeat the operation if you wish to invite multiple users. You can also copy and paste a list of emails separated by a coma. For example:
You can add up to 50 emails.
-
Add a Message that will be sent with the invitation (optional).
- Click Invite to send your invitation(s).
The invited users will receive an email to activate their accounts. Once they validate their account by setting a password, their status will change from Pending to Active in the user list.
Temporary email (also known as disposable) providers and email aliases are not allowed for registration.
The invited person will receive an invitation email with a link to create an account:
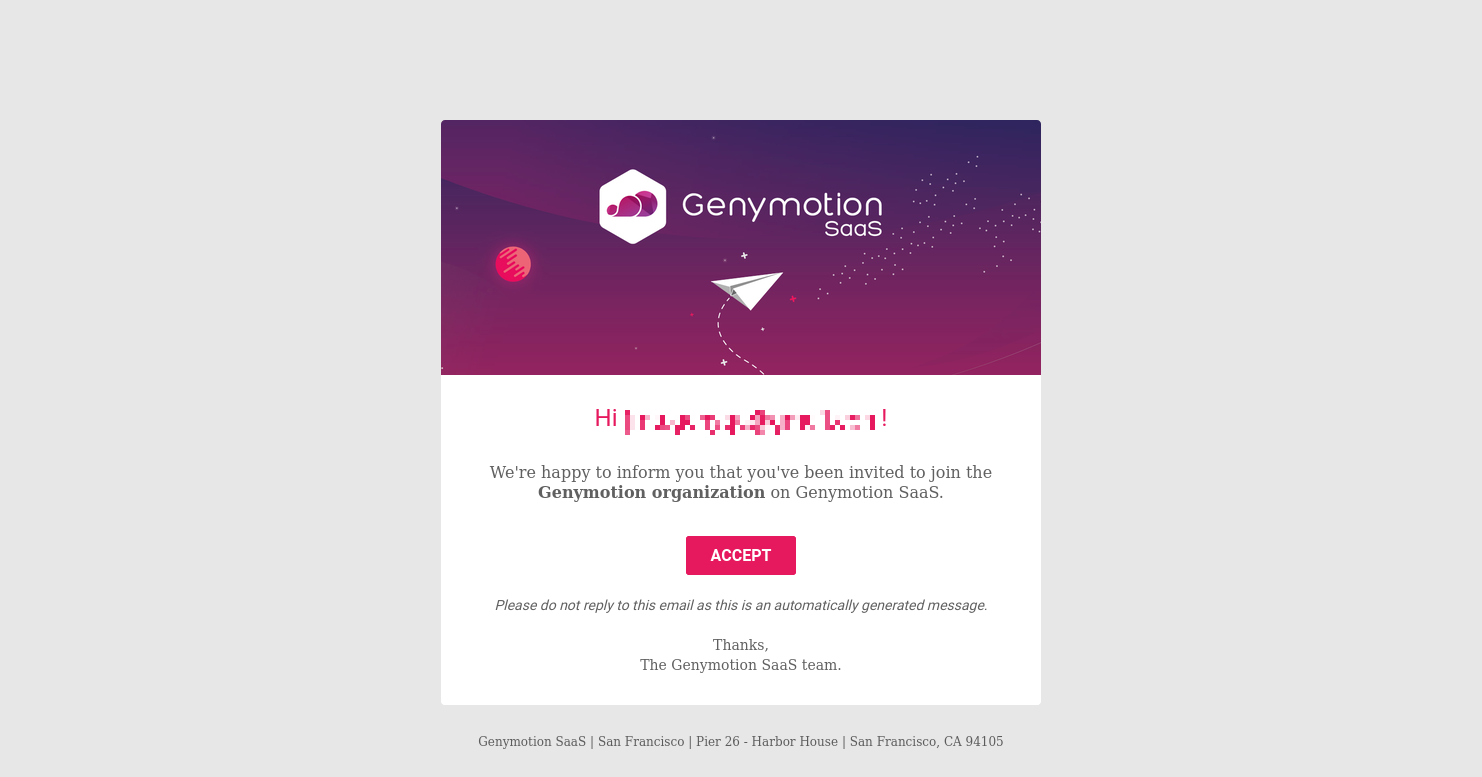
Then, they will have to create an account using Single Sign-On (SSO) or email:
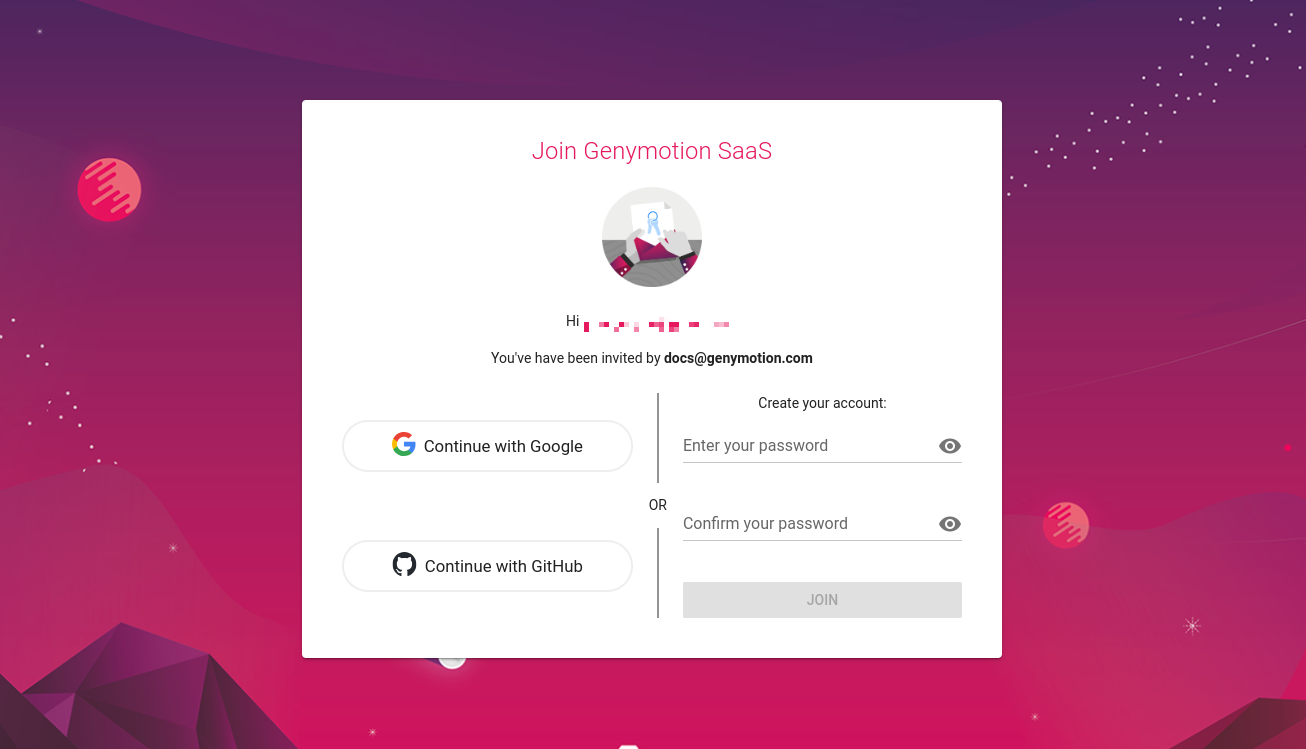
When using SSO, the Gmail or Github account of the invited user must match the email in the invitation.
You can resend invitations to pending members to remind them to join your organization. Click at the end of the line of the desired pending user to resend an invitation: 
Defining access to Genymotion SaaS
To activate or deny a user, click the switch  next to the user status on the line of the desired user:

Defining organization user roles
To change a user's role, click the button in the action column on the line of the desired user:
 to set as manager.
 to set as user.

Editing user names
Each user can define their first and last name in Profile.
As the organization manager, you can also modify them by clicking :

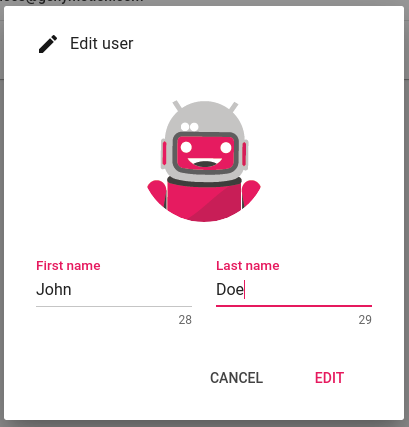
When the name is set, it appears instead of the user's email address in Genymotion SaaS.
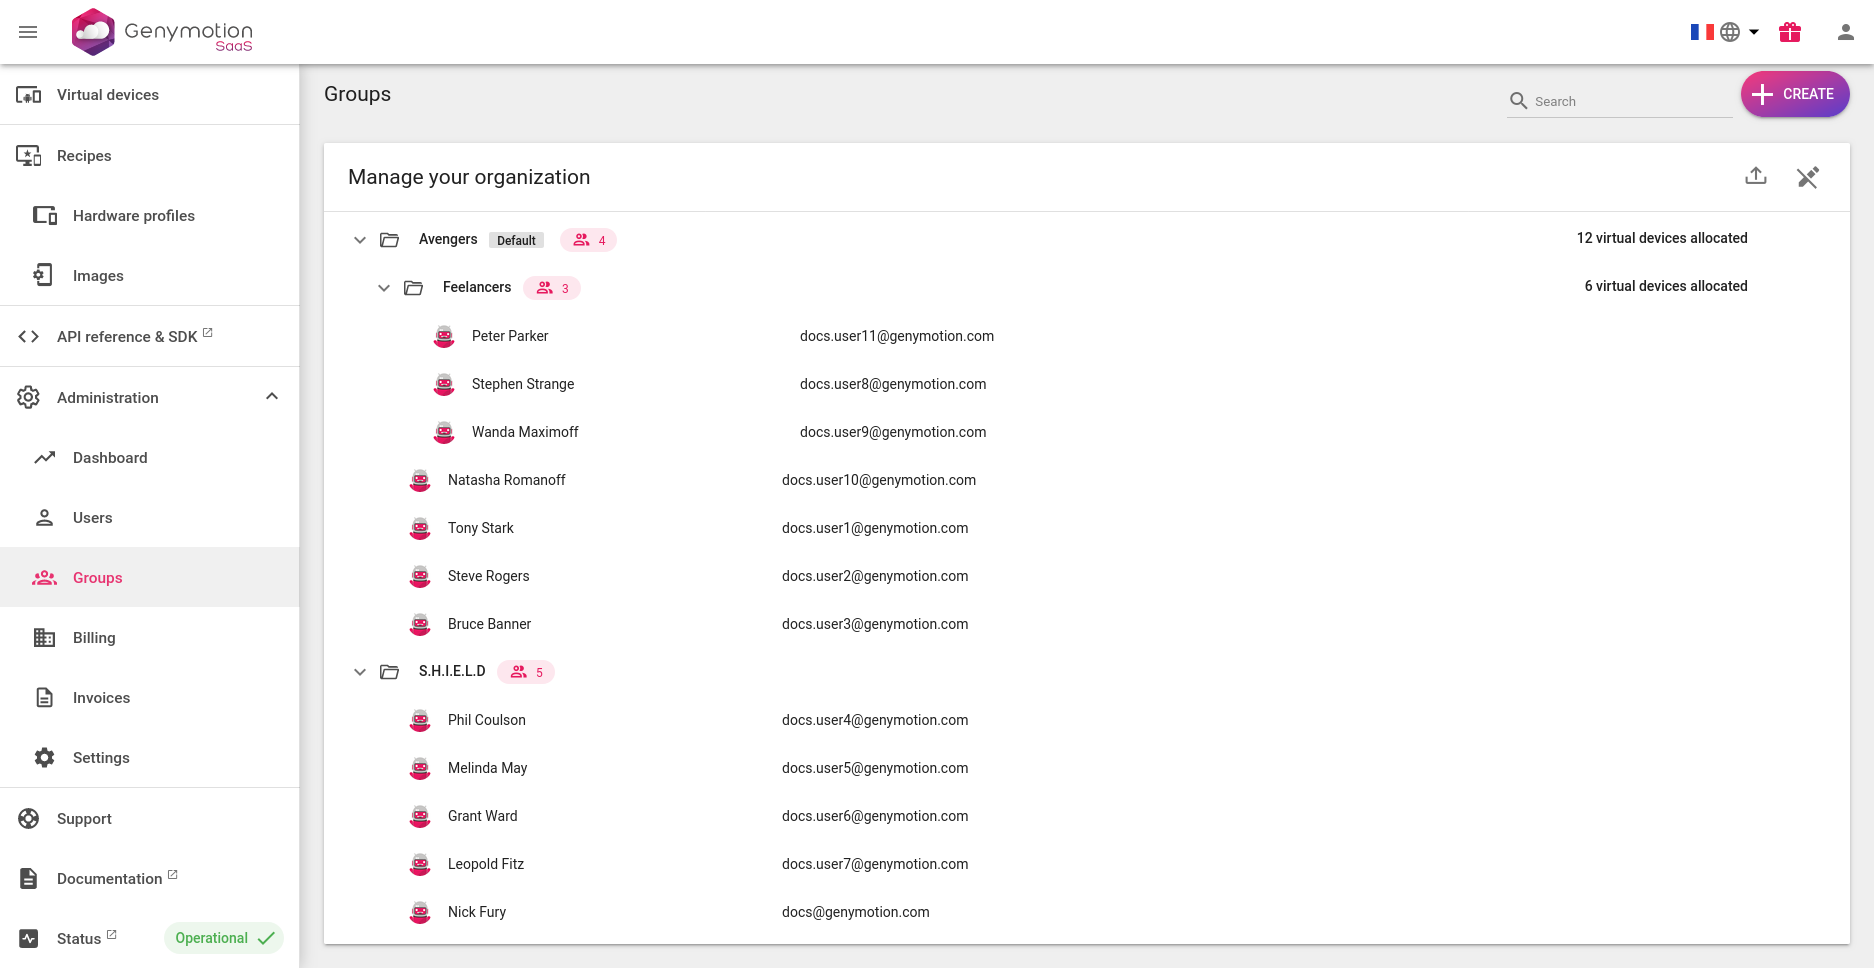
Manage groups
You can view and manage your groups in the Groups dashboard:
Create groups
Click  to open the Create group modal:
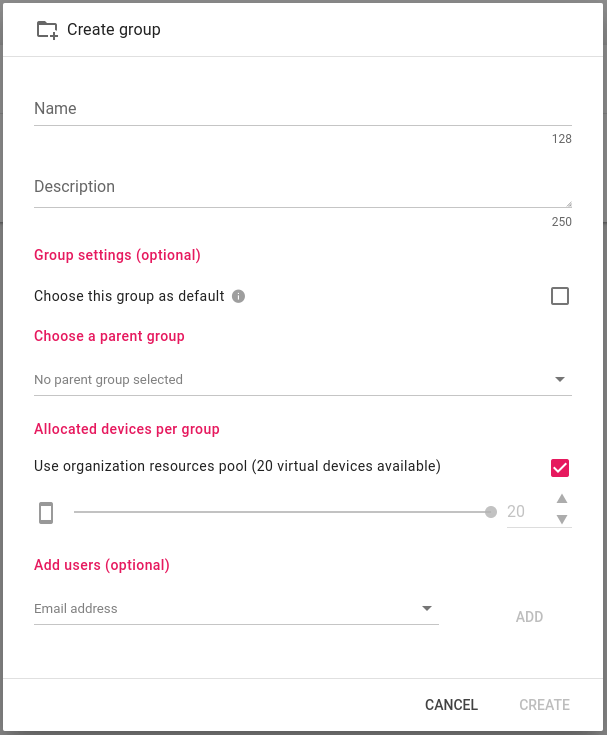
Then, fill the fields:
- Name: name of the group.
- Description: short description of the group (optional).
- Group settings (optional): check the box to define the group as default.
- Choose parent group: if you wish to create a sub-group, search and select a parent group from the combo box.
- Allocated devices per group: if you wish to set a quota of devices for the group, uncheck Use organization resources pool (or Use parent resources pool for sub-groups) and use the slider to set the limit. See Group Quotas for more details.
- Add users (optional): use the combo box to search and add users from your organization into the group and click ADD. This step is optional: you can add users later.
Group users
Add users
Only users from your organization can be added. External users must be invited first.
-
Click next to the group name to open the Edit group modal.

-
Use the combo box Add users (optional) to search and select a user. Click ADD to add the user:

Add users from a list sheet
You must create the users, groups, and sub-groups before adding users from a list sheet.
Supported list sheet formats are .csv, .xls and .xlsx
If you have many users to add in one or more groups, you can use a sheet list and import it.
To do so, click :

This will open the Import modal:
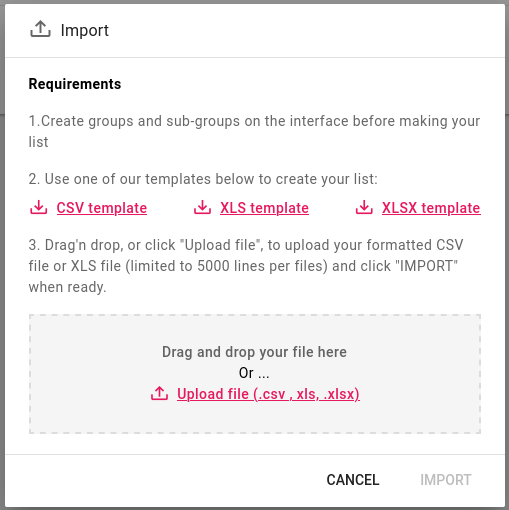
Download one of the templates and fill it accordingly:
Example in .csv format
email,group
[email protected],Avengers
[email protected],Avengers
[email protected],S.H.I.E.L.D
When done, drag'n drop it into the modal or click Upload file (.csv, .xls, .xlsx) to upload it. Click IMPORT to apply.
If there is an error, a file in the same format as the input file will be generated and downloaded to your browser downloads folder. This file will include the input data, plus additional columns indicating the errors (group not found, user not found, etc.).
Example in .csv
email,group,email_error,group_error
[email protected],Avengers,NotFound,
[email protected],Avengers,NotFound,
[email protected],S.H.I.E.L.D,NotFound,
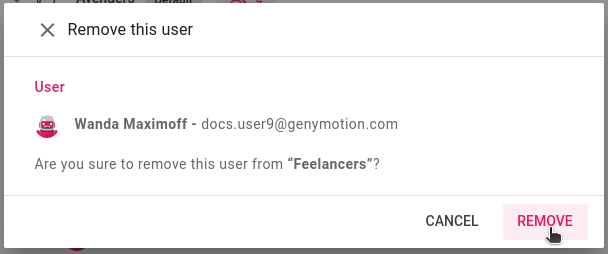
Remove users
Click next to the user you wish to remove:
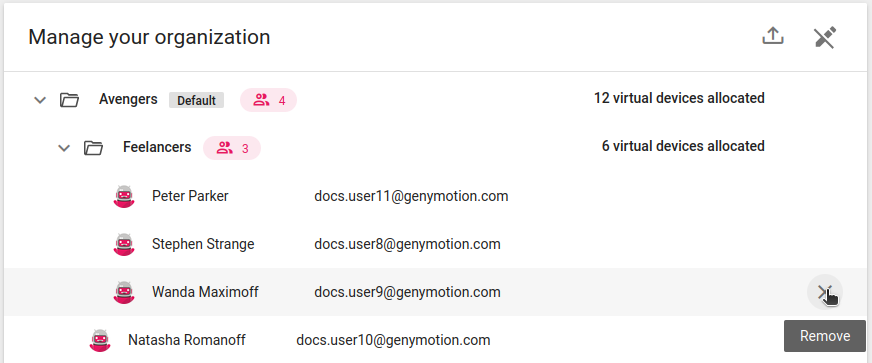
Then, click REMOVE to confirm:
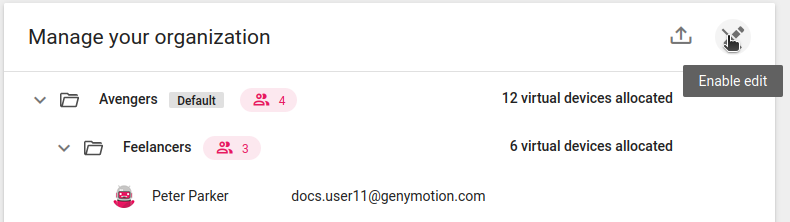
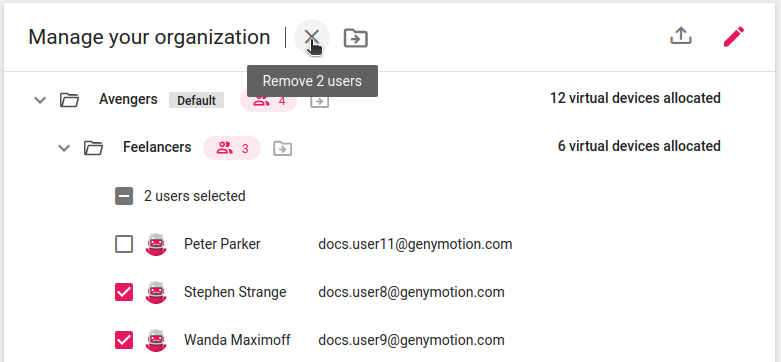
You can also bulk remove users:
-
Click to enable bulk edit mode:
-
Bulk select the users you wish to remove, and click :
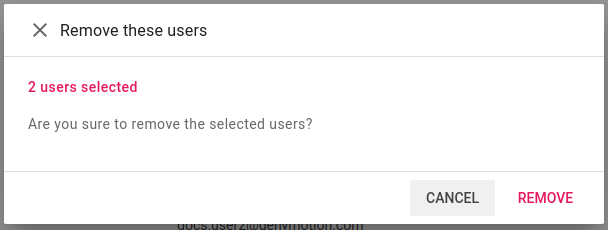
-
Click REMOVE to confirm:
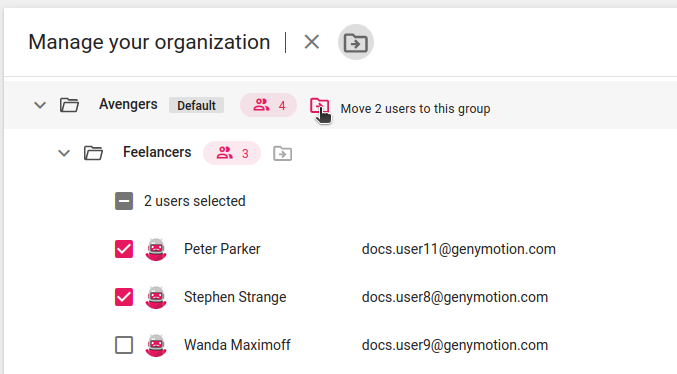
Move users
-
Click to enable group and bulk edit:
In bulk edit mode, you can click Select All to select all the users of a group. Click again to de-select all.
-
Select the user(s) to move. Click and select the destination group:

or click next to the destination group:
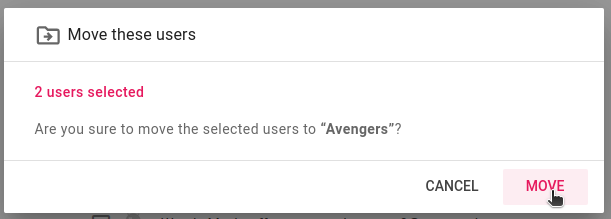
-
Click MOVE to confirm:
Group quotas
You can set maximum devices quotas for groups, either when creating a new group or by editing a group:
- Click next to the group name to open the Edit group modal.
-
Uncheck Use organization resources pool and use the slider to set the quota:
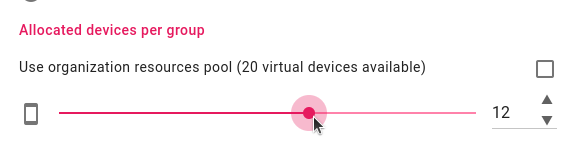
For sub-groups, this option is called Use parent resources pool.
-
Click CONFIRM to apply the change.
Group quotas are then displayed in the groups dashboard:

Warning
The sum of all the group quotas cannot exceed your organization maximum devices. For example, if your organization has 10 max devices and you already allocated 5 devices to one of your groups, you will only have 5 devices left to allocate to the other groups.
Note
Users who do not belong to any groups can start as many devices as allowed by the organization maximum devices, minus the allocated devices. For example, if your organization has 10 maximum devices, one group and there are 7 devices allocated to this group, users who do not belong to the group will be able to start 3 devices.
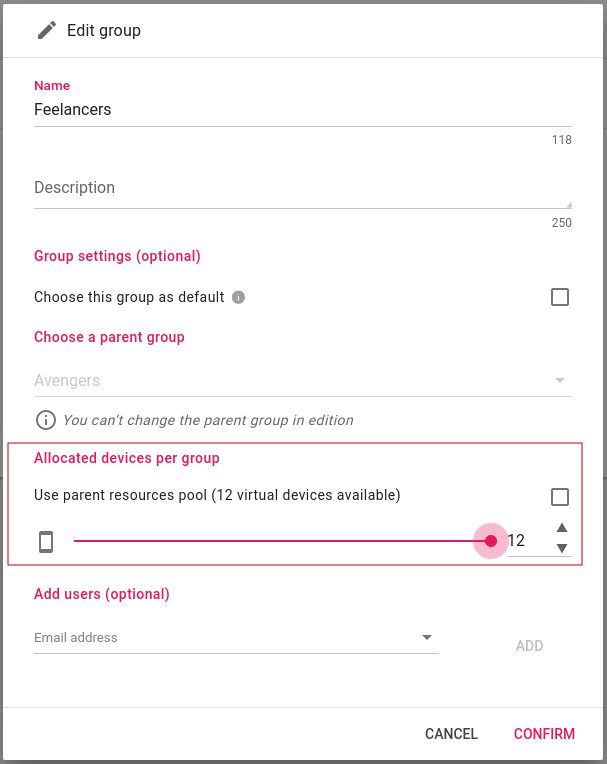
Sub-group quotas
You can also set quotas to sub-groups, but only within the allocated devices of the parent groups.
For example, if you have a group with 12 allocated devices, you can only allocate 12 devices max to its sub-groups.
Example
In this example, we have a sub-group Freelancers of the group Avengers. The parent group has 12 devices allocated, so it is only possible to allocate up to 12 devices to the sub-group:
Guests
Quotas apply to guest users in accordance to the recipe owner group's quota.
Example
Nick Fury belongs to the group Avengers which has only 12 allocated devices. If Nick Fury shares one of his recipes to a guest, then this guest can only run up to 12 devices with this recipe.
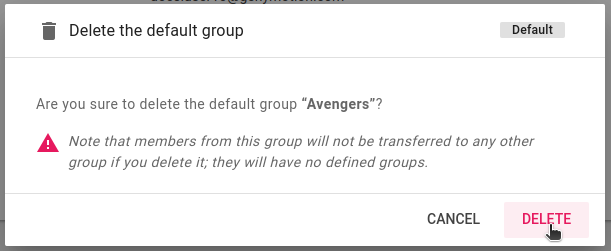
Remove groups
To remove a group, click next to the group you wish to delete:

Then, click DELETE to confirm:
Plans and Billing
This page contains your organization details (name, billing address, etc), your current plan and credit card details:
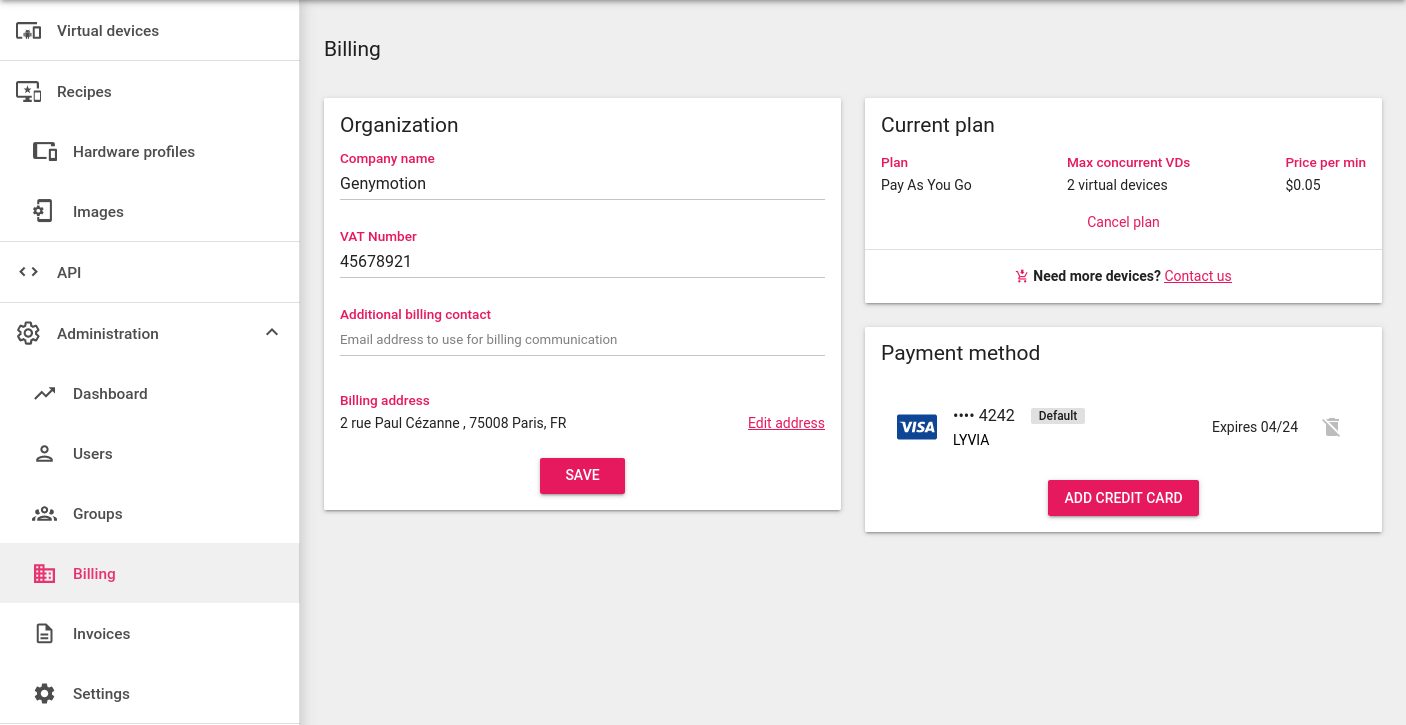
Current plan
In this section, you can view or cancel your current subscription. If you don't have a subscription, or if you wish to subscribe to a new plan, you can select one of our available plans from there.
For more information about our current offers, please refer to the Pricing page.
Billing information
This section displays your billing information:
- Company name: the name of your company/organization.
- Billing address: your billing address.
- VAT number: your VAT if applicable.
- Additional billing contact: you can add a contact who will automatically receive a copy of billing emails, such as invoices and payment-related communications.
Those information can be changed at any time by clicking Edit billing information.
Payment methods
This section displays your payment method. Only credit cards are supported for the moment; for other payment methods, please contact our sales department .
You can add up to 5 credit cards. The Default card will be used first at each end of a billing cycle. Additional cards will be used if payment fails for any reason. This avoids having your subscription suspended and devices stopped in case of payment failure.
You can change your default card and delete your credit cards at any time by clicking Add credit card. Please note that you cannot delete the default card associated with an active subscription. You have to cancel your current plan first.
Prepaid credit cards are not accepted.
Invoices
This page displays all your previous invoices:

You can click  to see the details of an invoice,
or click to download it as PDF.
to see the details of an invoice,
or click to download it as PDF.
In case of payment failure, click  to open the online payment form.
Invoice detail
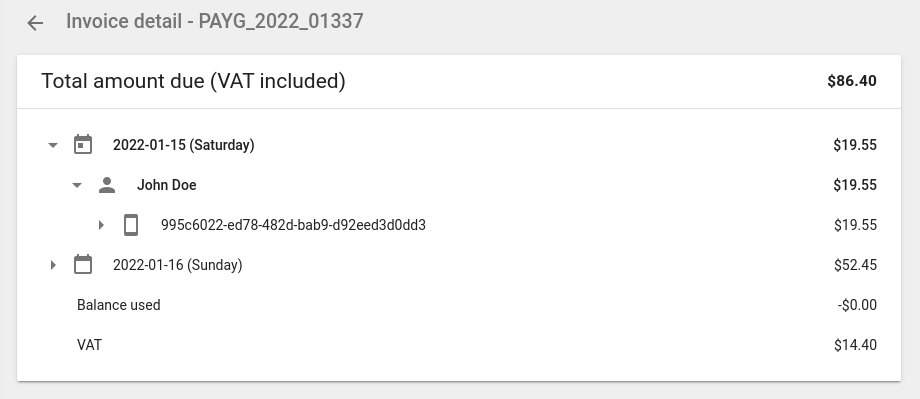
The invoice detail page allows you to check your billed usage, and see which devices have been used by users. This page is an estimate and may slightly differ from the final invoice.
In case of payment failure, click  to open the online payment form.
Settings
This page allows you to set the organization Datacenter location, Frontend inactivity timeout and Maximum run duration:
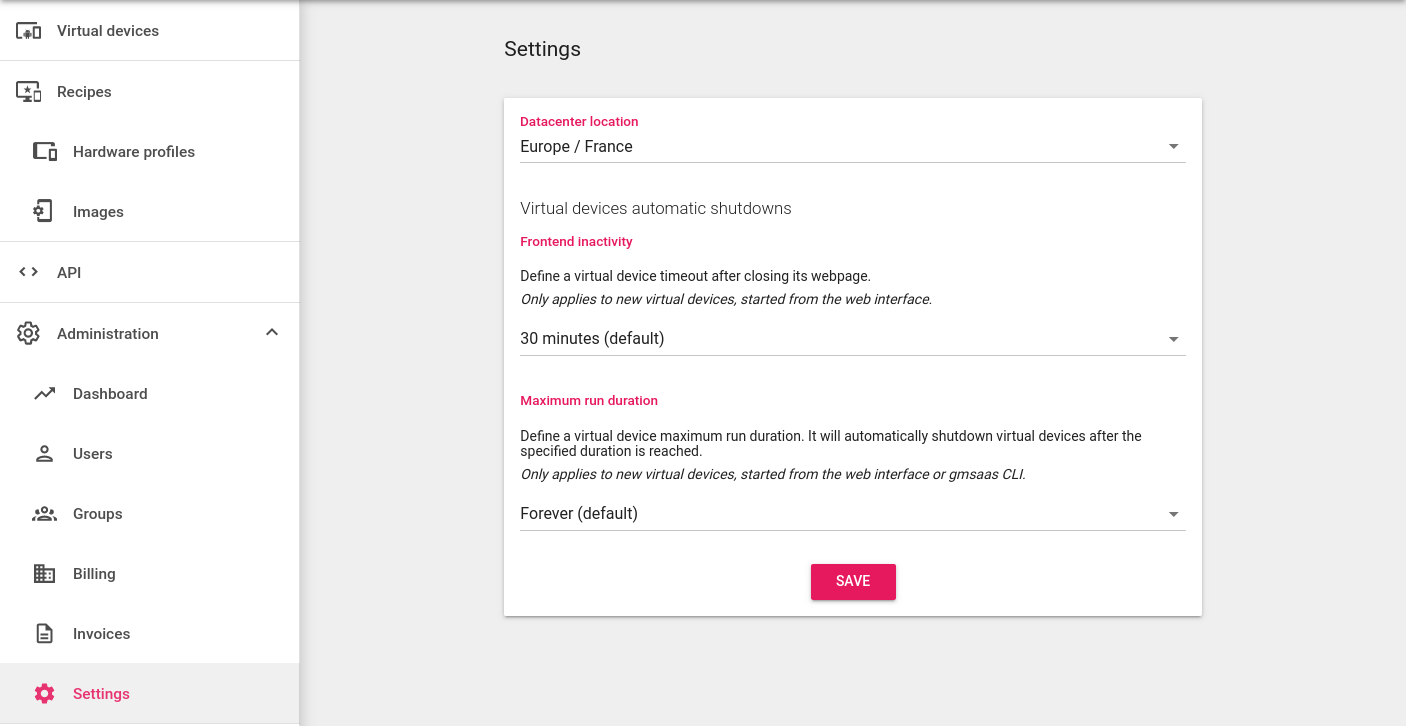
Datacenter location
You can also change the data center directly from the top toolbar. See Graphical Interface.
The Datacenter location defines where you want your virtual devices hosts to be. Pick the nearest location for better performance.
By default, the location is the one you selected when creating your account.
Frontend inactivity
Closing your web browser, tab or logging out will not stop your running virtual devices.
The Frontend inactivity setting allows you to configure the delay after which the device will be stopped in this case. The default value is 30 minutes.
Frontend inactivity timeout will not apply if the device display webpage/tab is still opened, or the device has been started with gmsaas CLI tool.
Maximum run duration
The Maximum run duration setting allows you to configure the maximum duration time of your virtual devices. They will automatically shutdown after the specified duration is reached, whether or not they are active.
Countdown starts when the virtual device goes online.